In August I started a mentorship with Jobye Karmaker via SkillTree. With this post I want to break down some of the things I've learned, and some of the work I've done to get to this point.
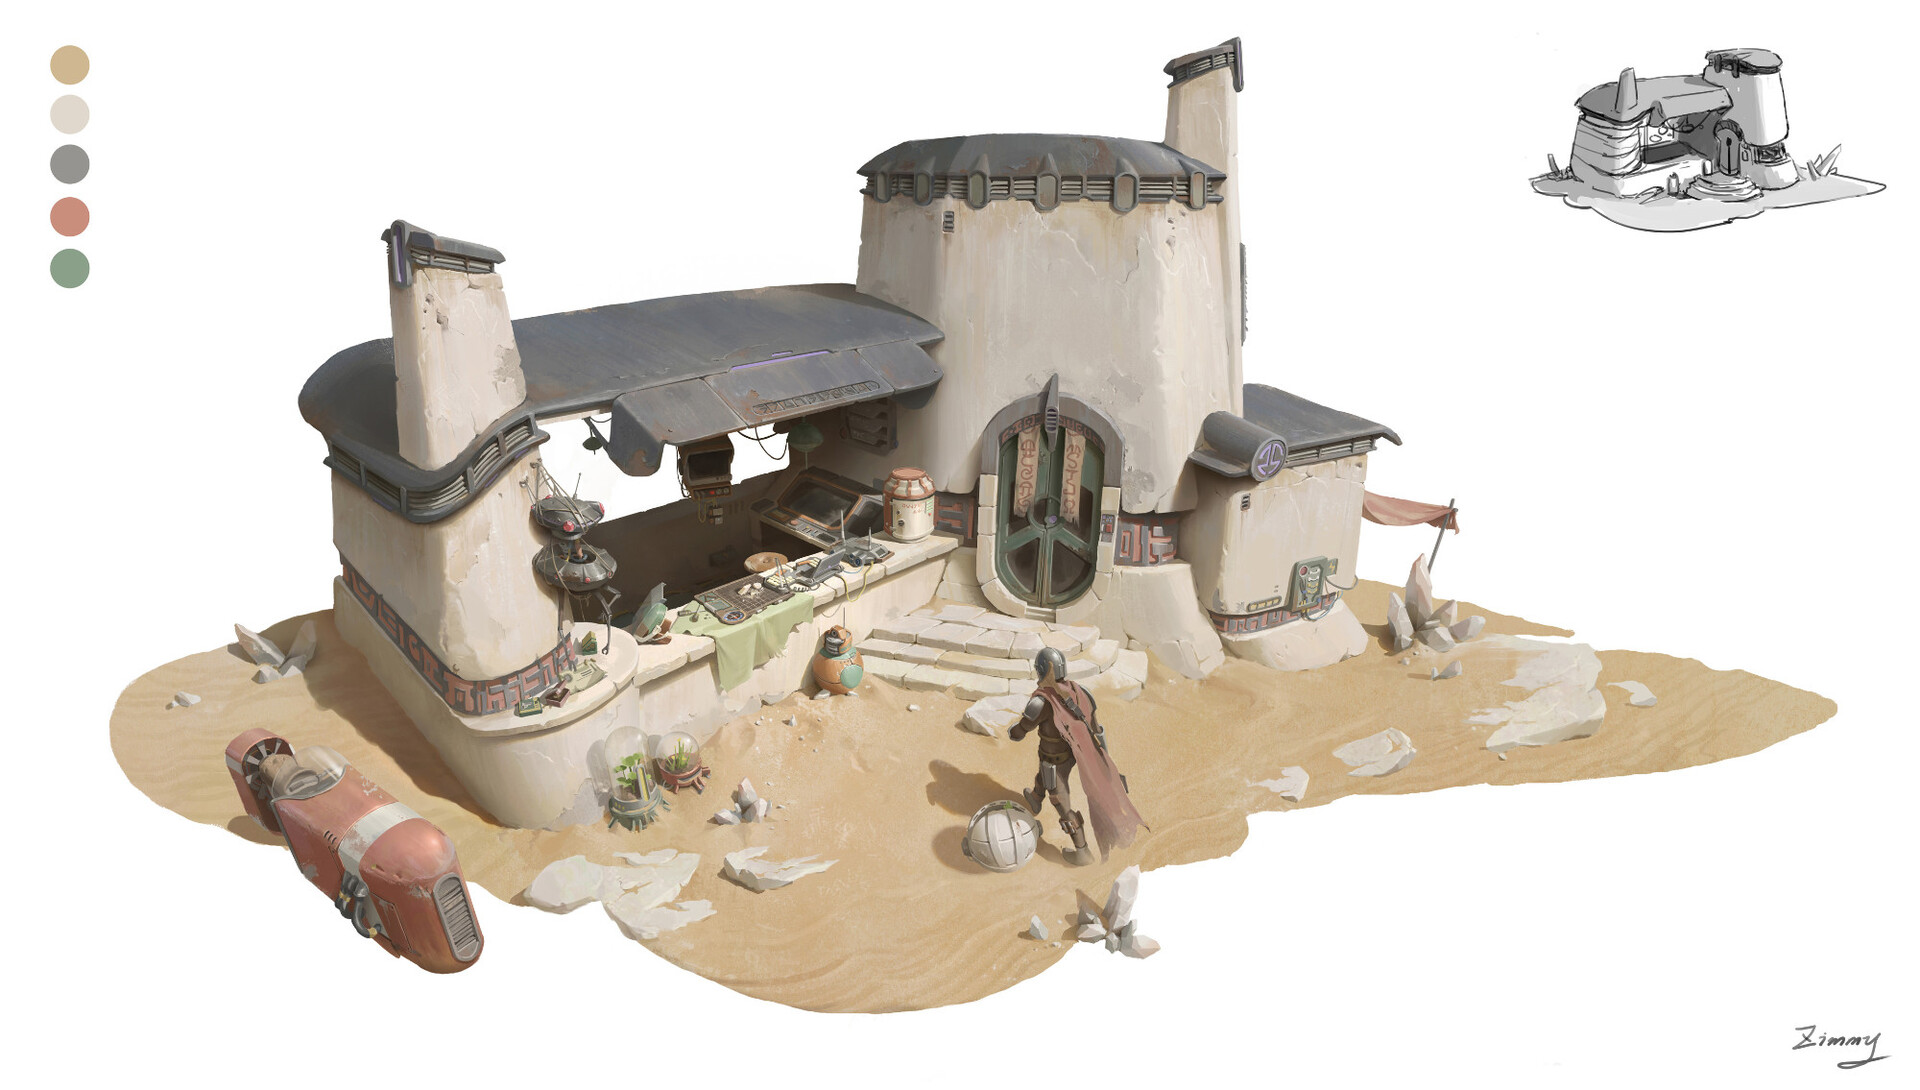
I set up the mentorship with Jobye because he has a breadth of experience working on environments, and I really like the stuff he did for Jedi: Fallen Order. I didn't have an initial concept to work on when I first reached out to him, but as I started scouring ArtStation for things that inspired me I came across this concept for a technology repair shop in the Star Wars universe by Zimmy.
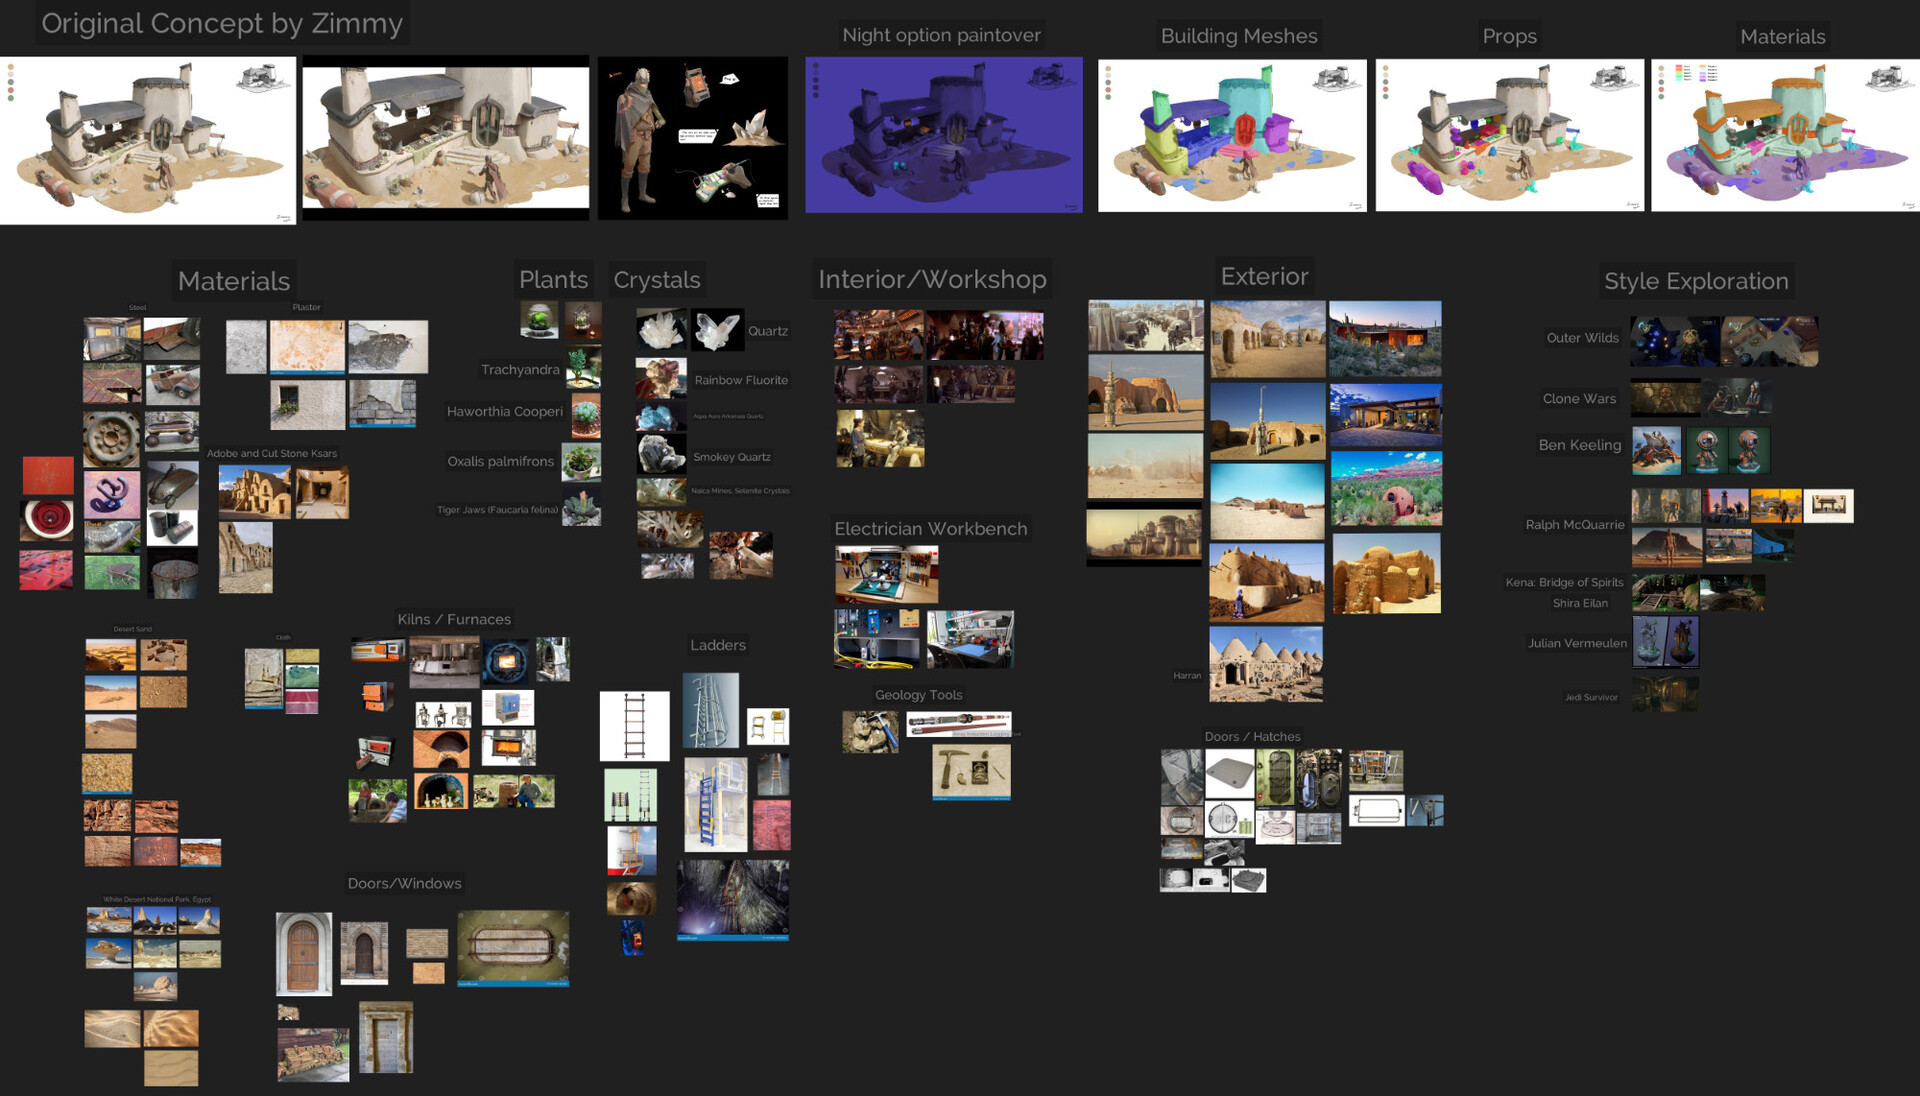
I spent a fair amount of time getting reference together and thinking through everything that I would need to make. I did a few paintovers to break things down. The concept has a number of interesting places for practical light sources, so I made a night version as well. Some of the ref below came later as I discovered it was needed.
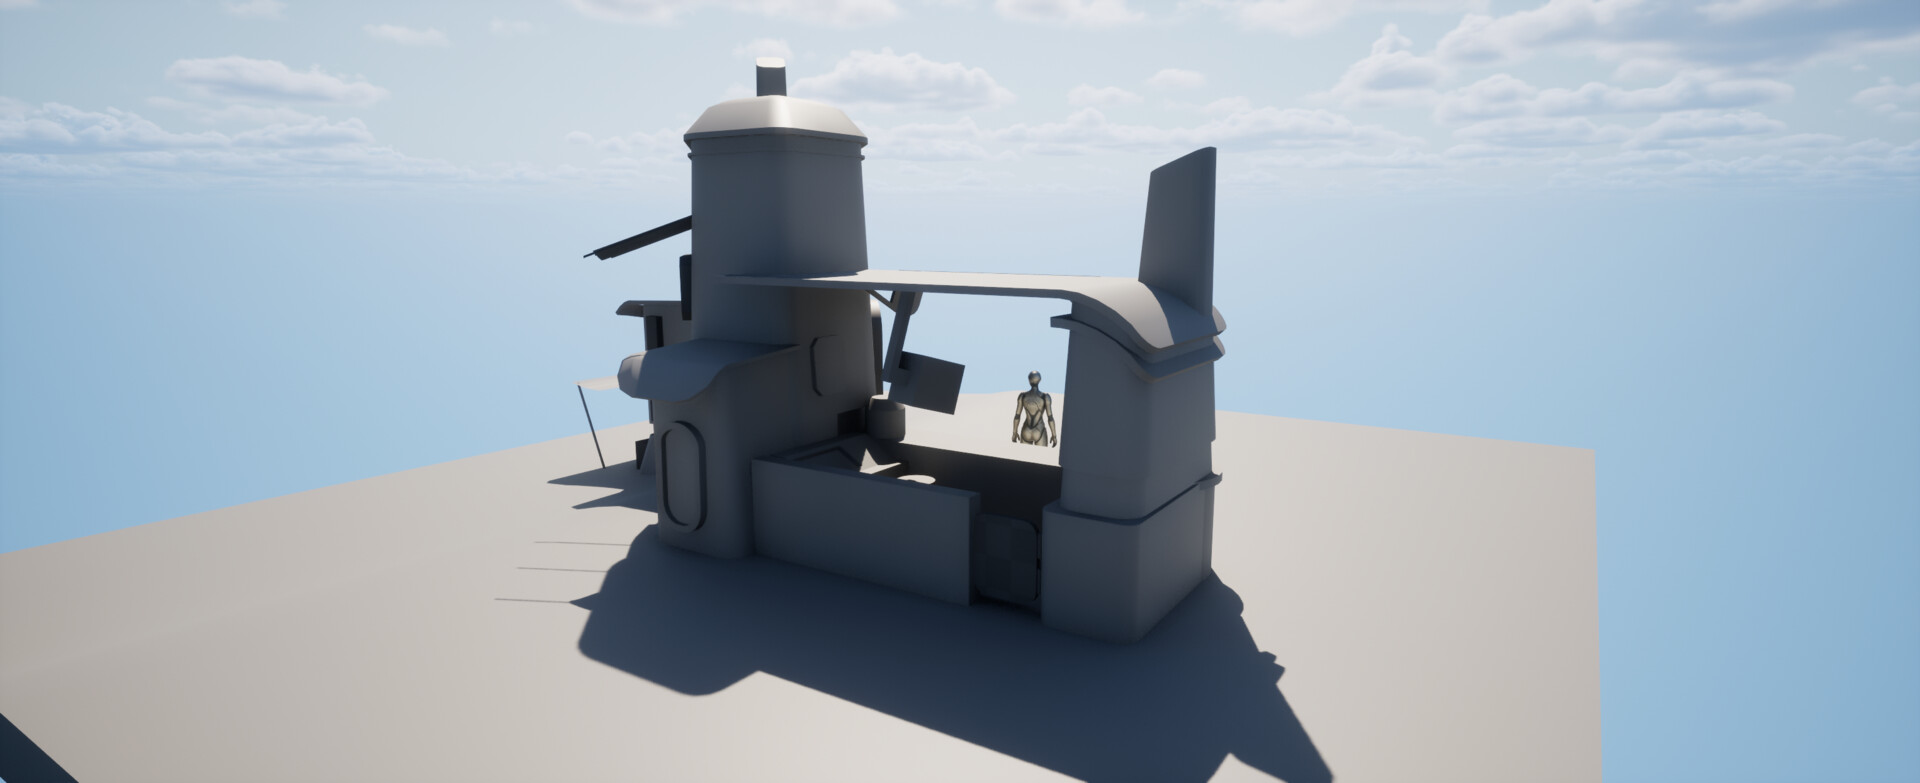
One of the most valuable things I took away from the mentorship was the workflow. The idea is to get the whole scene together and in the engine as early in the process as possible. First pass was to get blocked out meshes, temporary materials, and rough lighting in the scene.
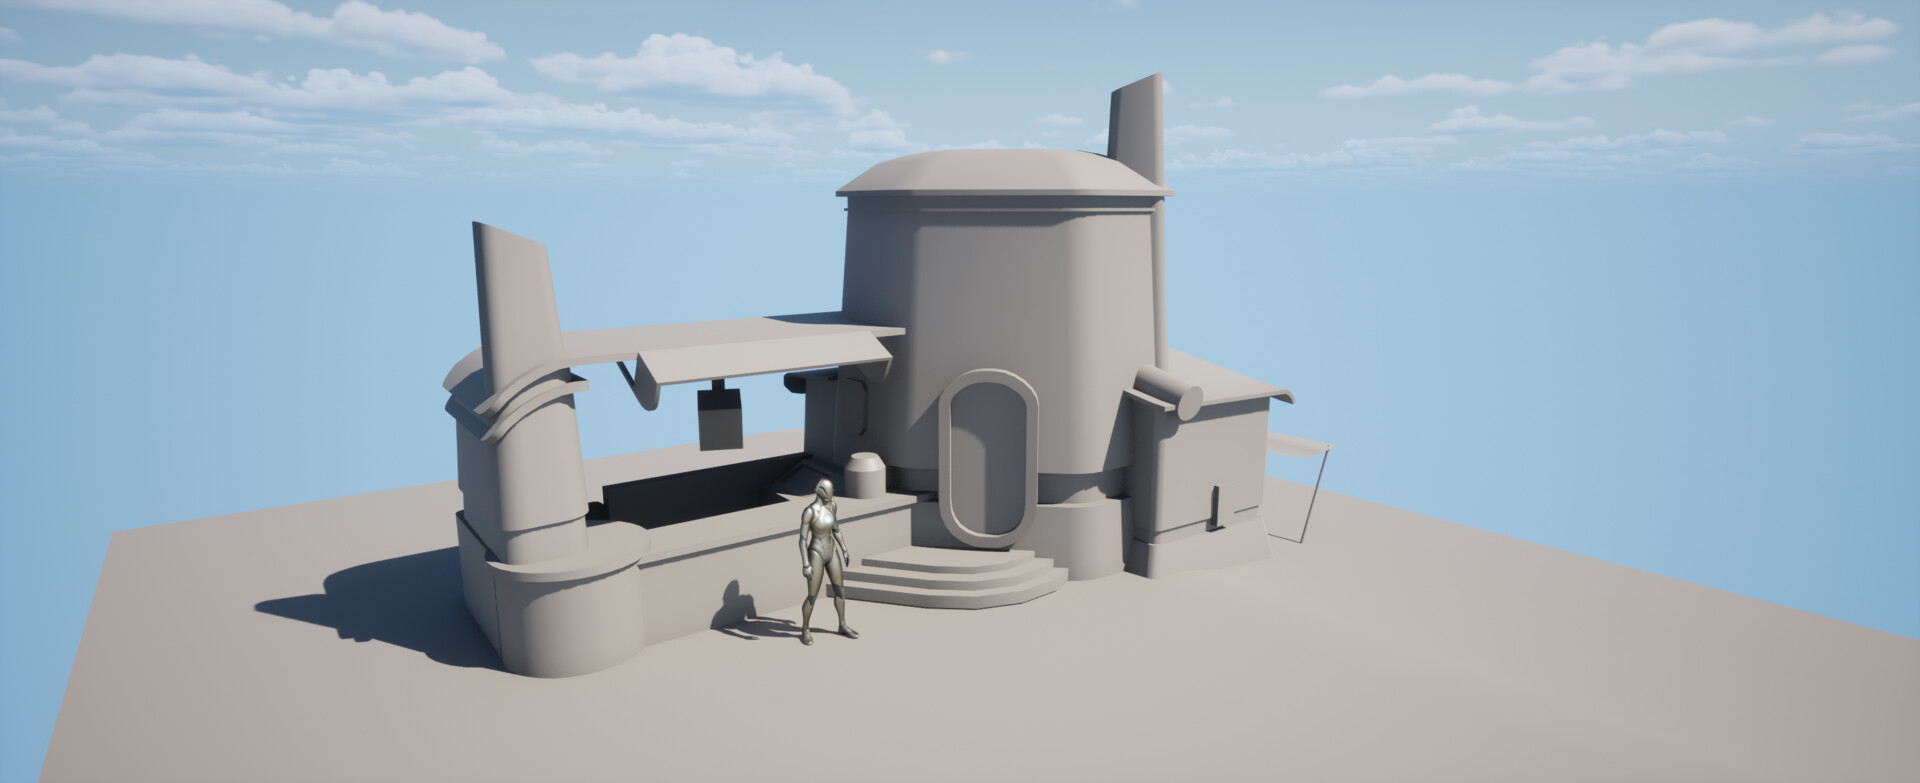
Before finishing the blockout I spoke with Jobye, and he pointed out that the scale of some of the elements didn't feel quite right along side the character ref. I made some adjustments to the door heights and panel positioning.
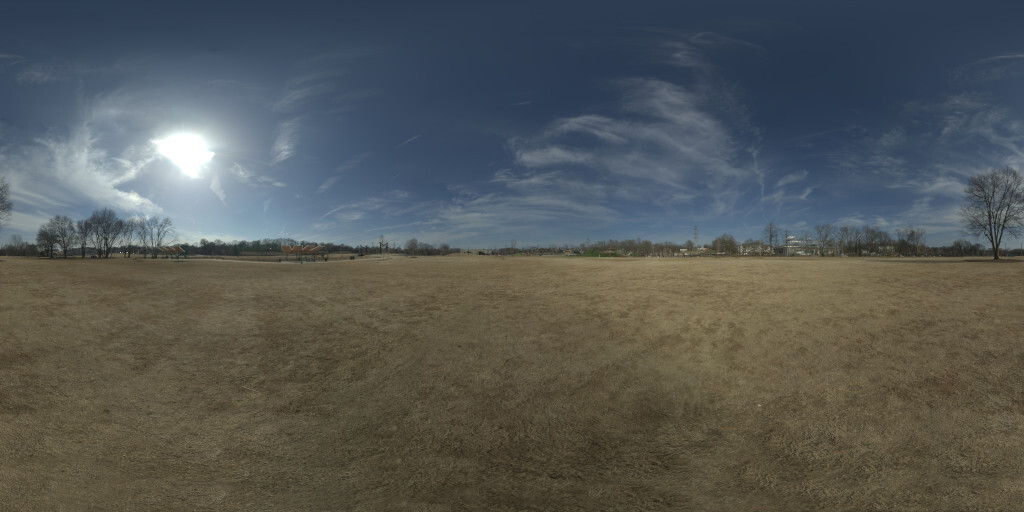
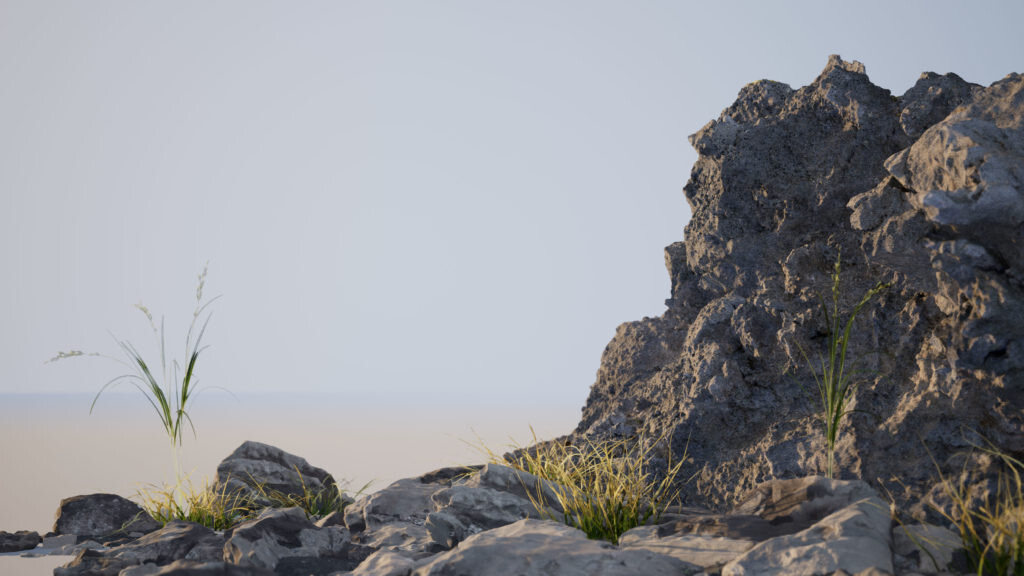
I used Megascans materials for this pass. I also found a desert sky hdri on Polyhaven and set up and balanced basic lighting.
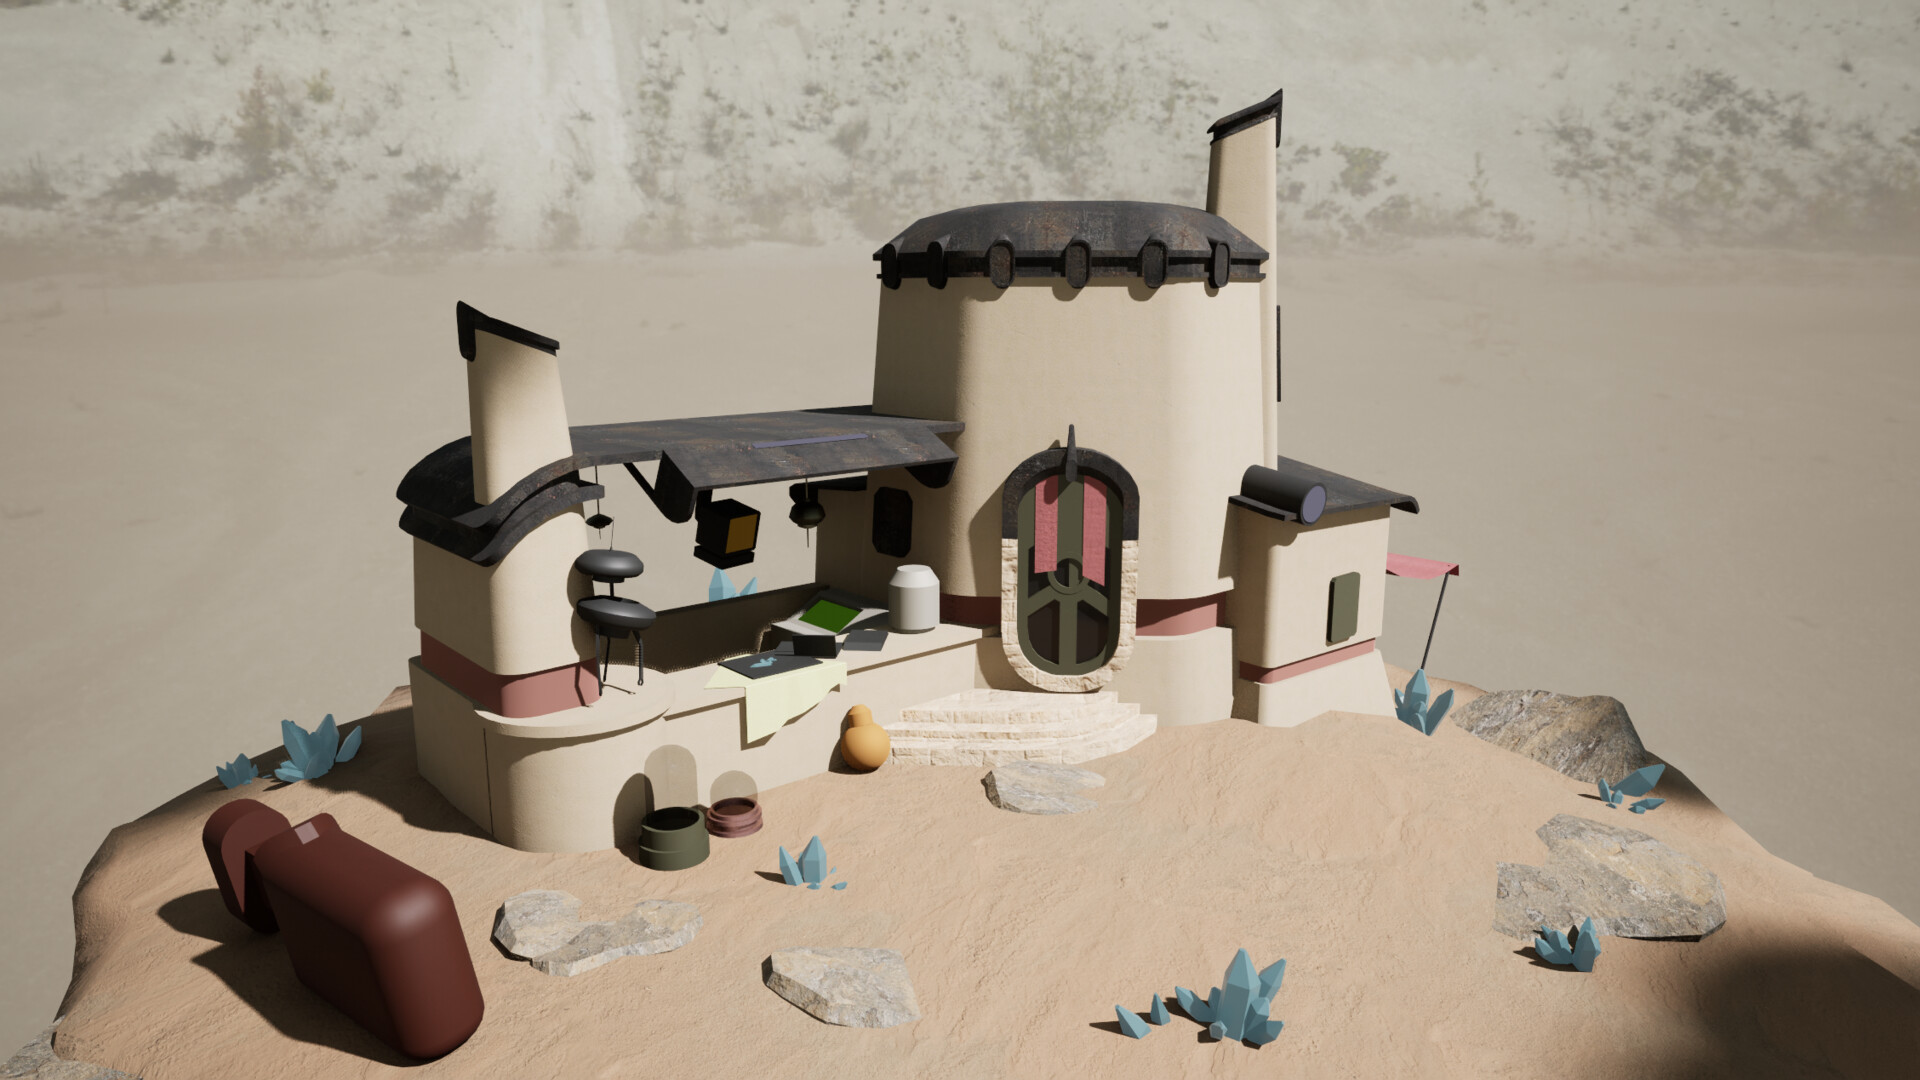
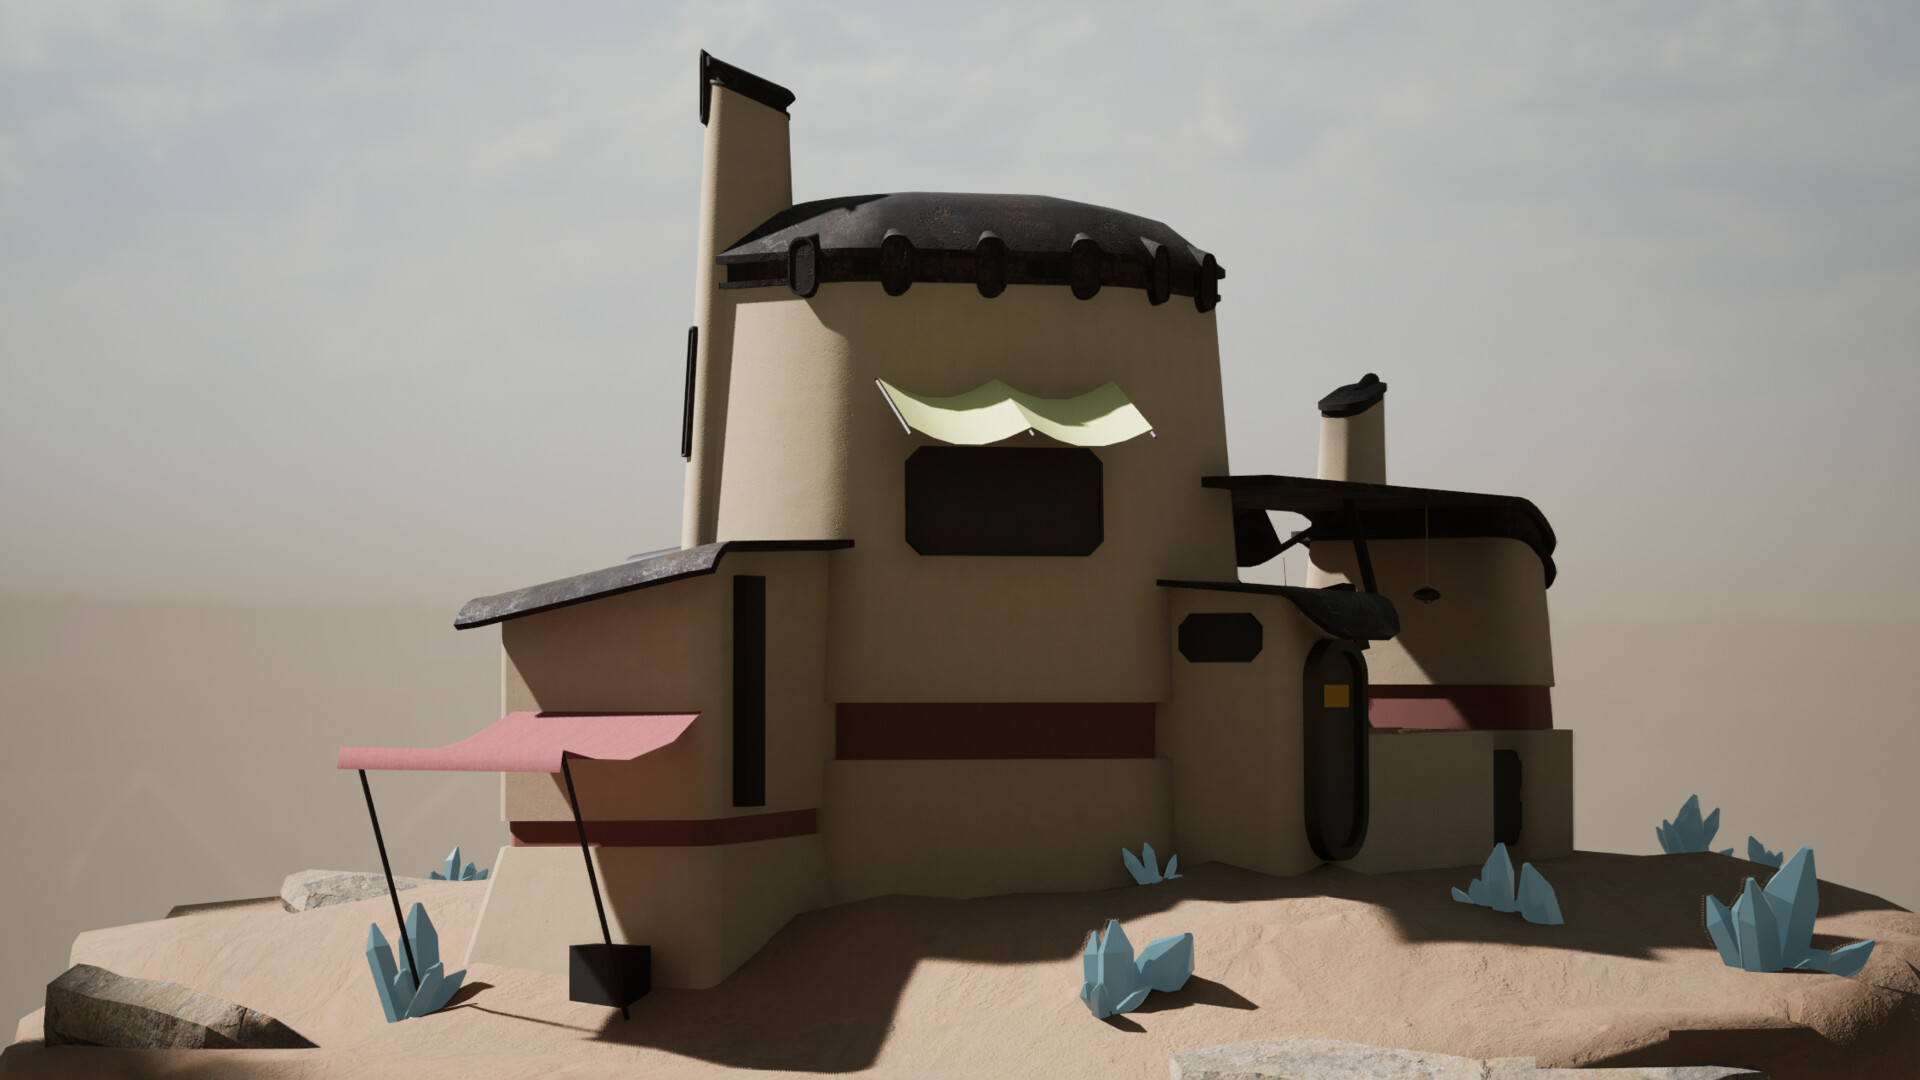
Part of first pass is to set up camera angles that will represent the final renders of the project. This is to keep things focused on the important elements of the scene, and subvert travel down rabbit holes. An important lesson I learned here was to keep the number of shots to a minimum. I had initially let my imagination go a little wild. The concept artist had described that the crystals surrounding the building were used to enhance and repair electronics. The back of the building hadn't been rendered by the concept artist, so I tried to add elements to support the story. I ended up building a whole crystal mine with a ladder connecting to the shop above.
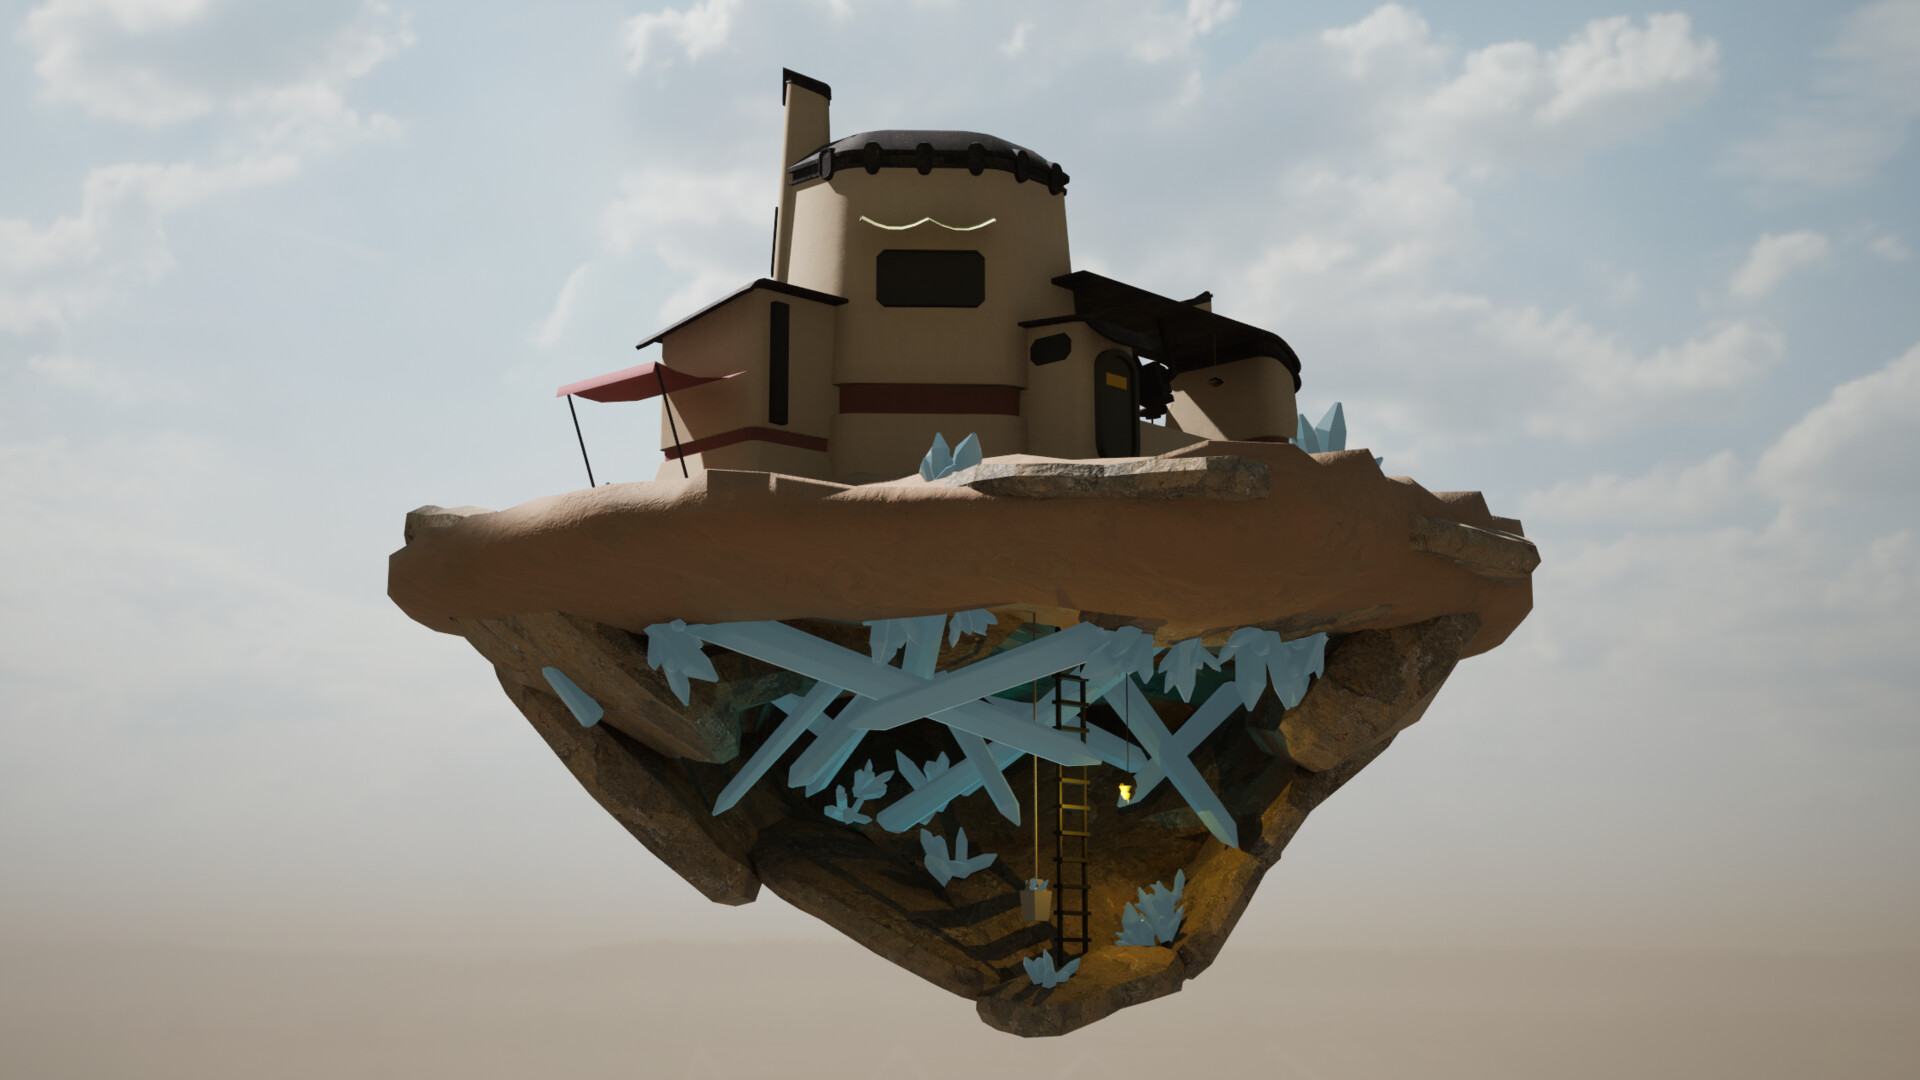
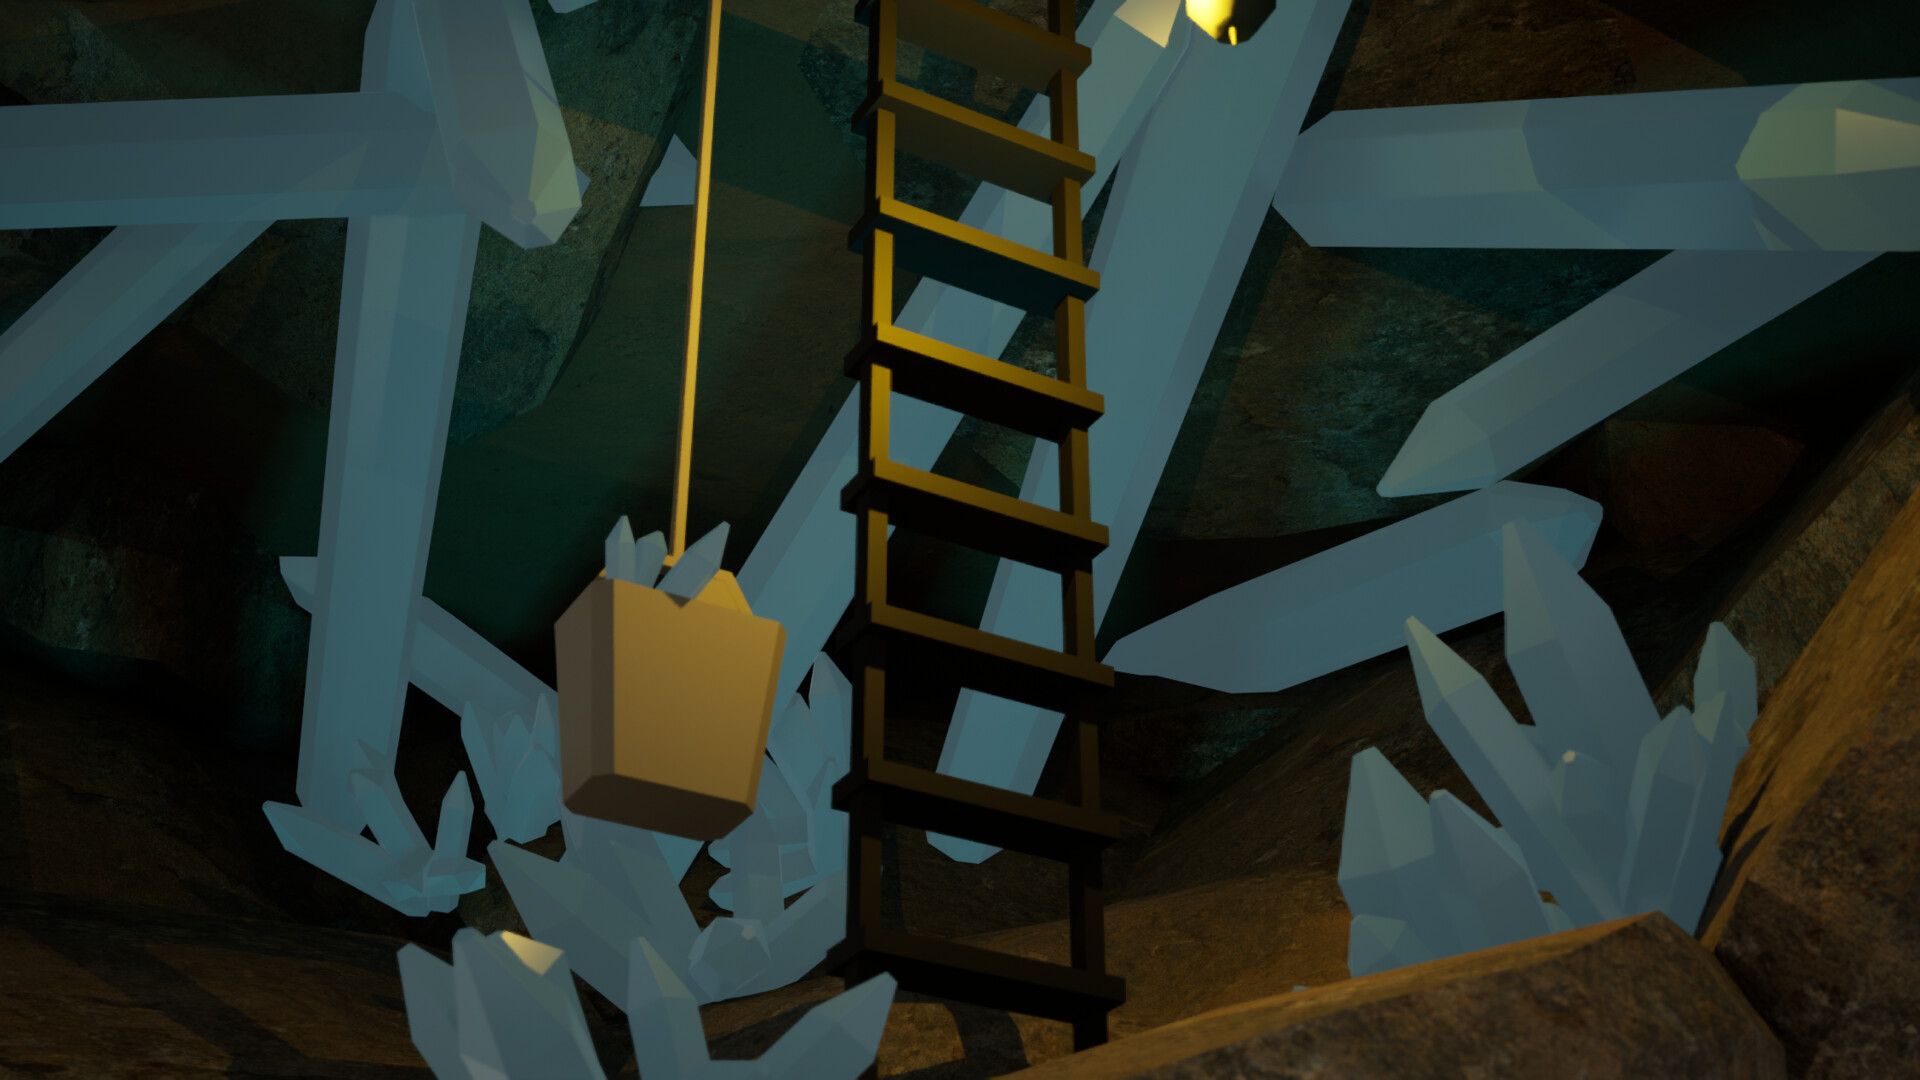
Ultimately, I decided to leave this behind as I felt it was splitting my attention too much from the original concept. I had also set up a few other shots focusing on different elements in the shop, but abandoned these as well because they just weren't very interesting compositions. I finally narrowed it down to three shots that I could focus on. Since my concept is a diorama, I've been picturing a rotating render of the scene to go along with the shots I've set up. Even though I'm leaving some elements of my blockout behind, the process has still helped me flesh out the scene and create what I will need for the turnaround.
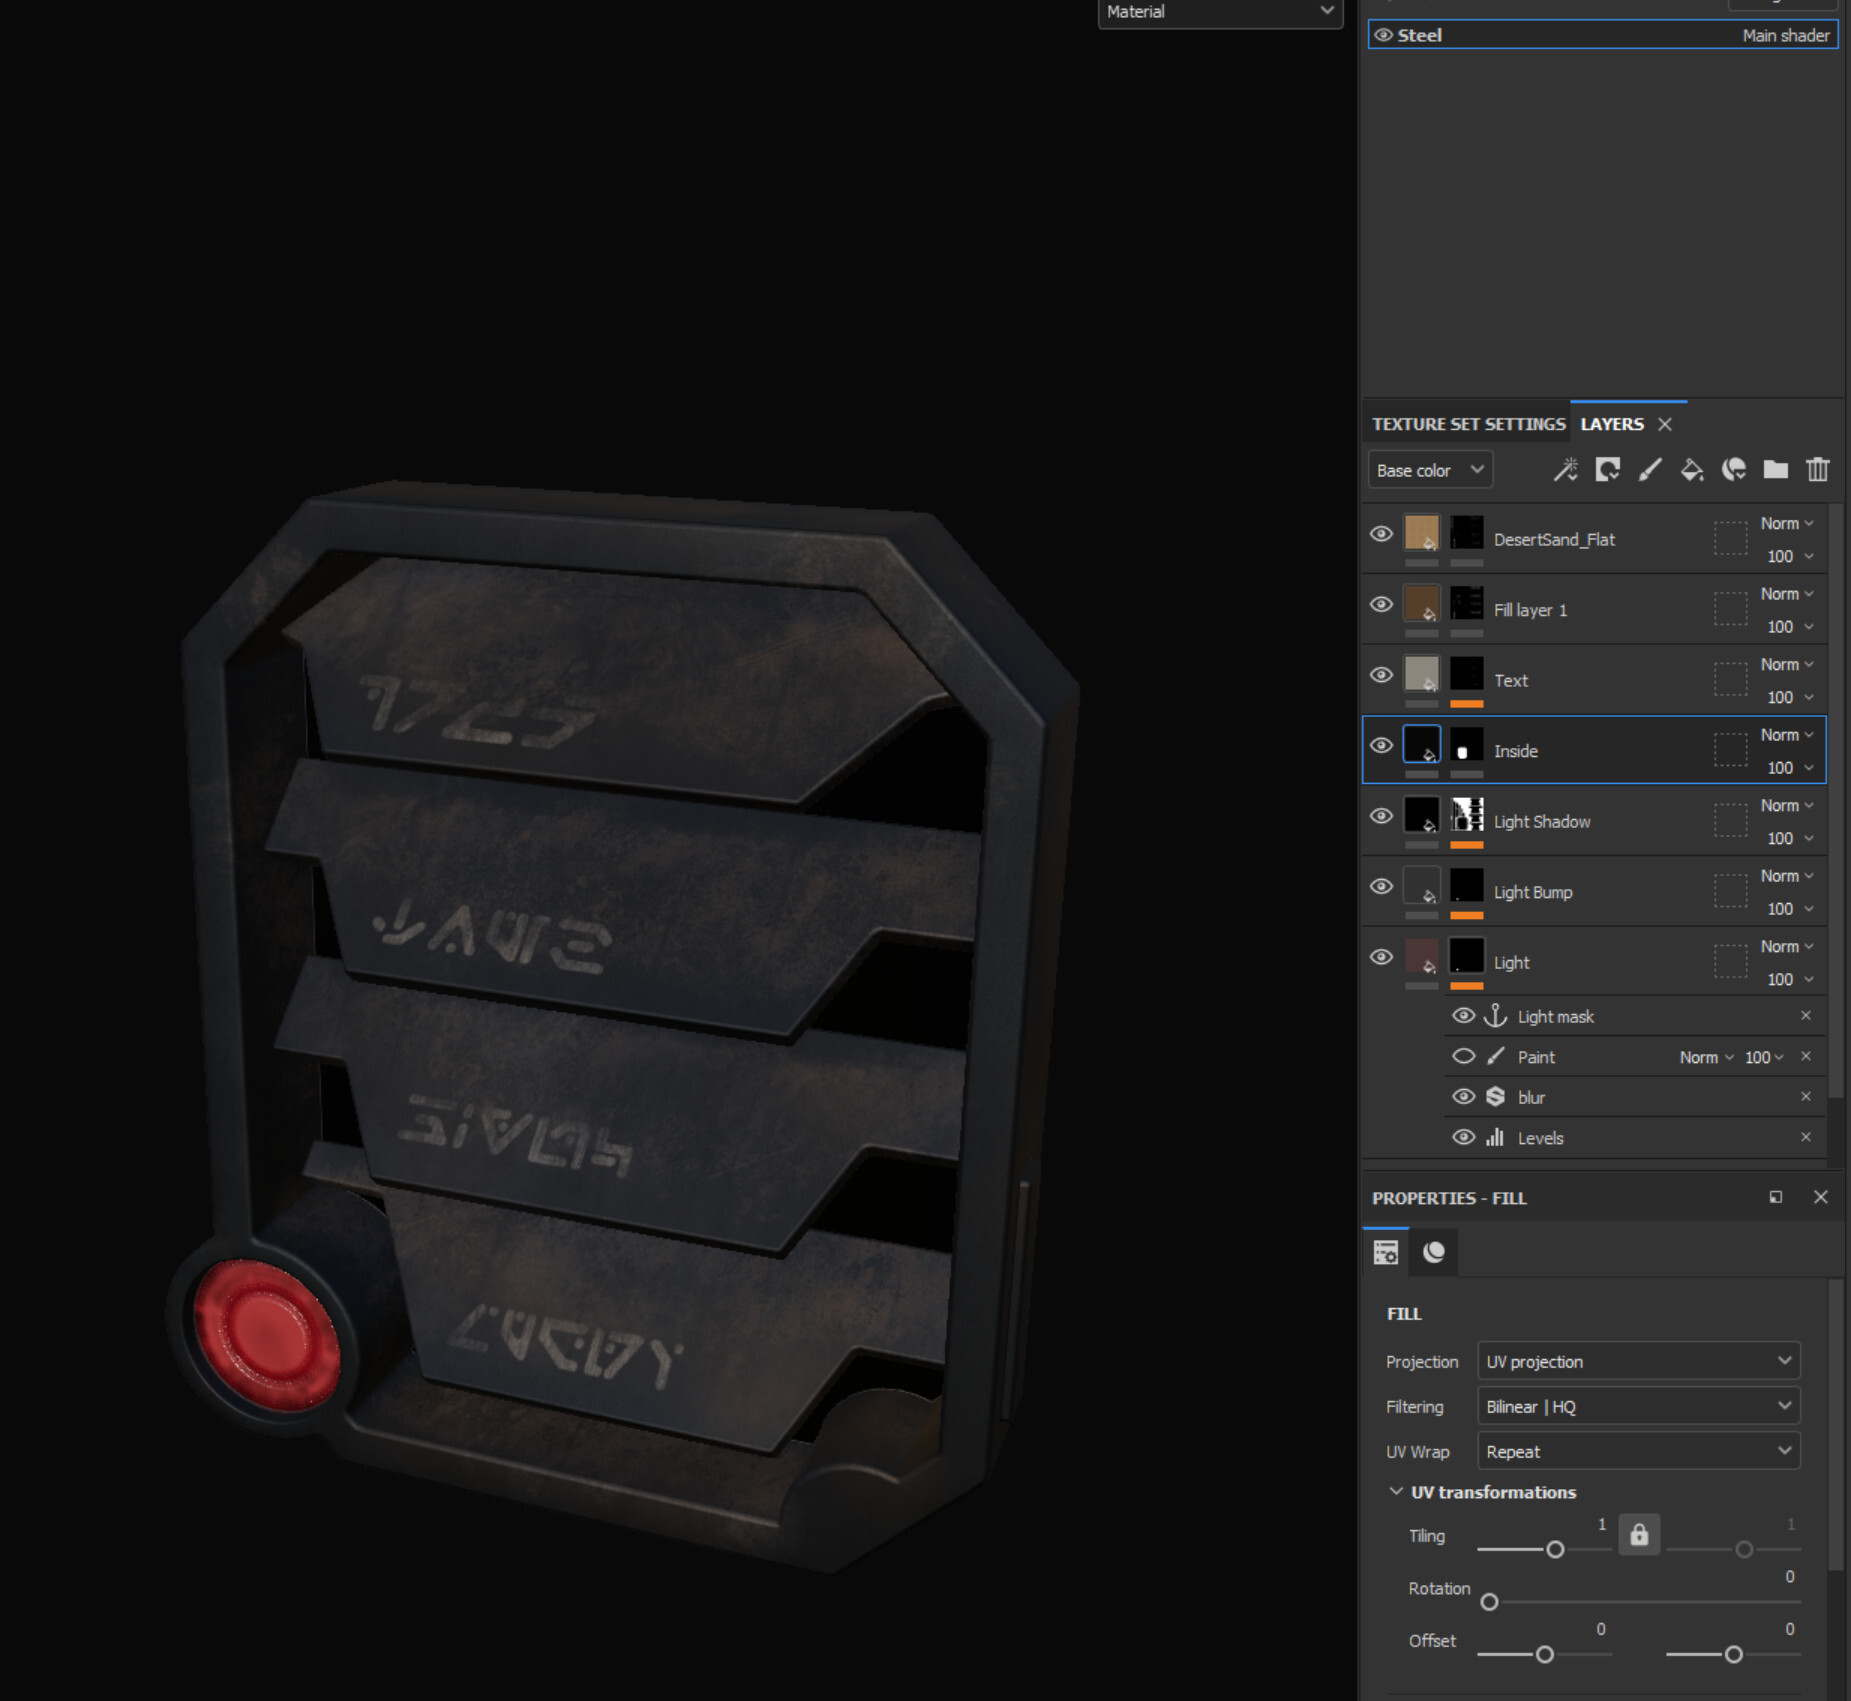
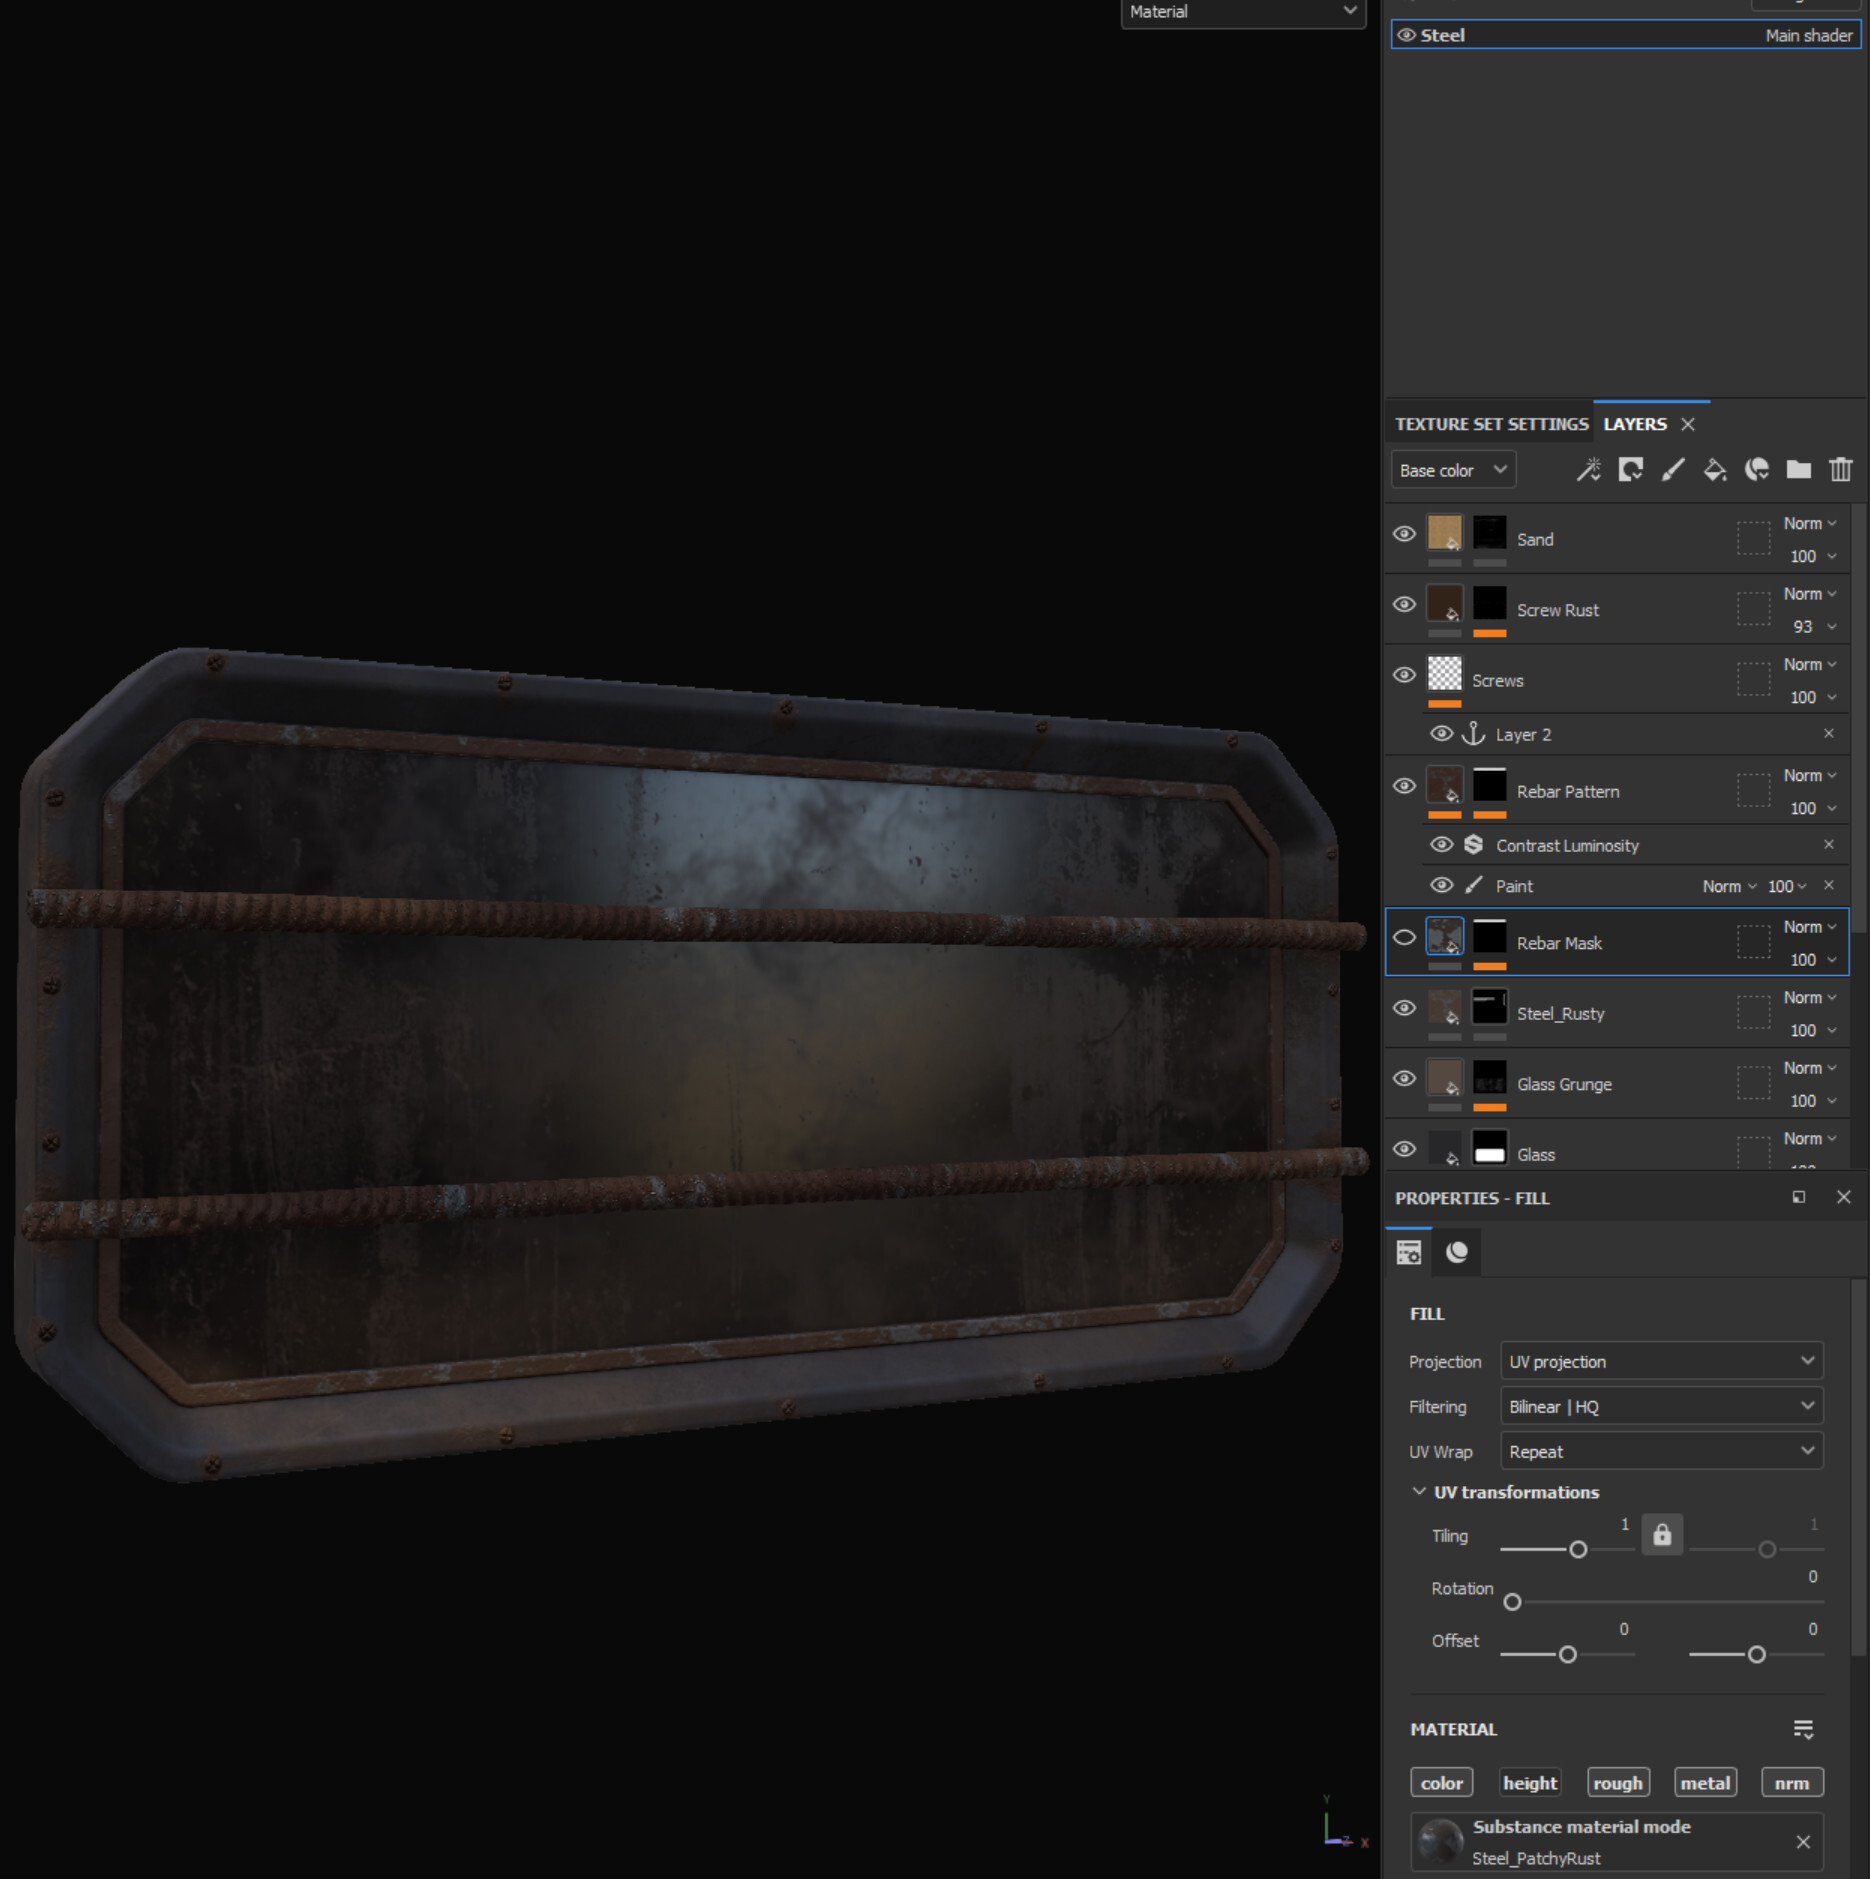
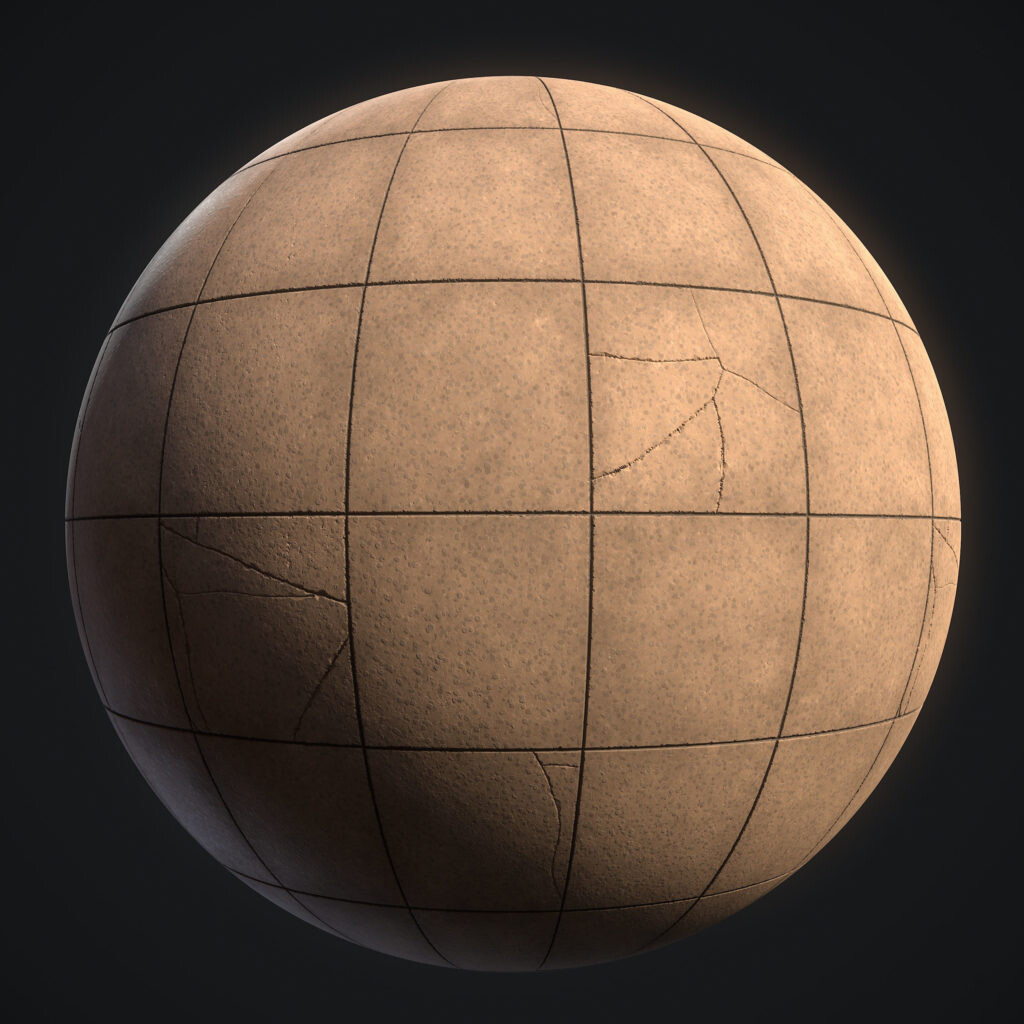
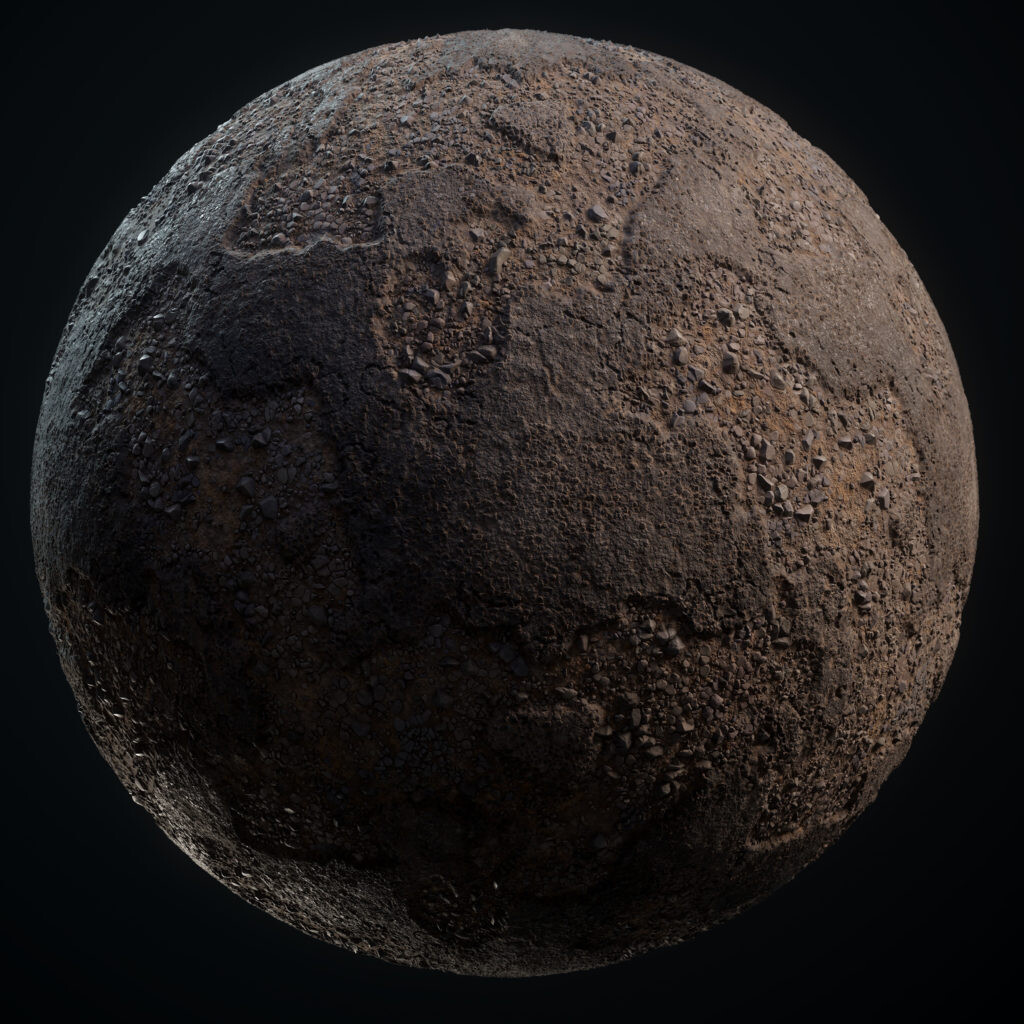
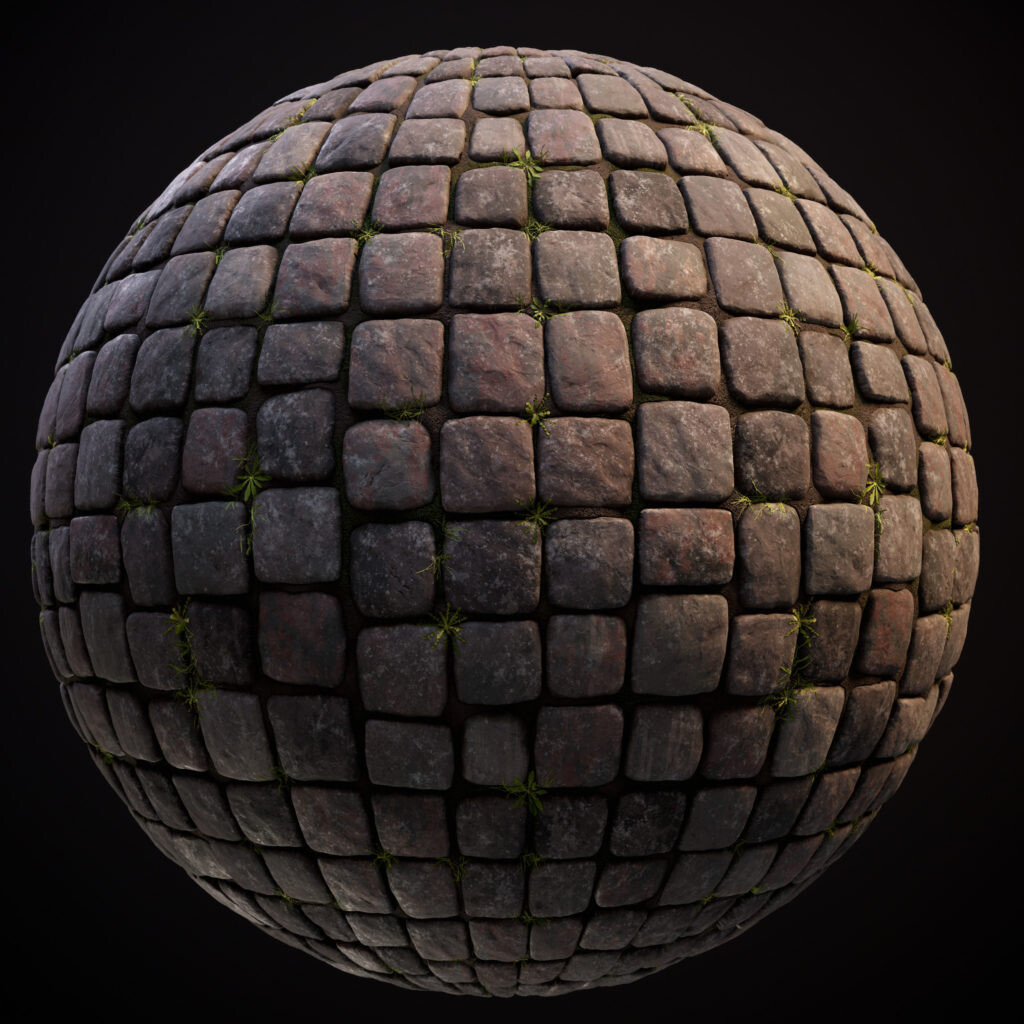
The second pass is the vertical slice. For this the goal was to take the main building, steps, and ground to a finalized state. This is where I really worked through the details of how to create my meshes and materials. One of the biggest things I wanted to learn from Jobye was how to blend materials and add specific details to meshes that are too big to fit on a single texture sheet. I created a few materials in Substance Designer to tile over my building meshes and ground. I created plaster, steel, and sand materials as well as some variations to blend between.
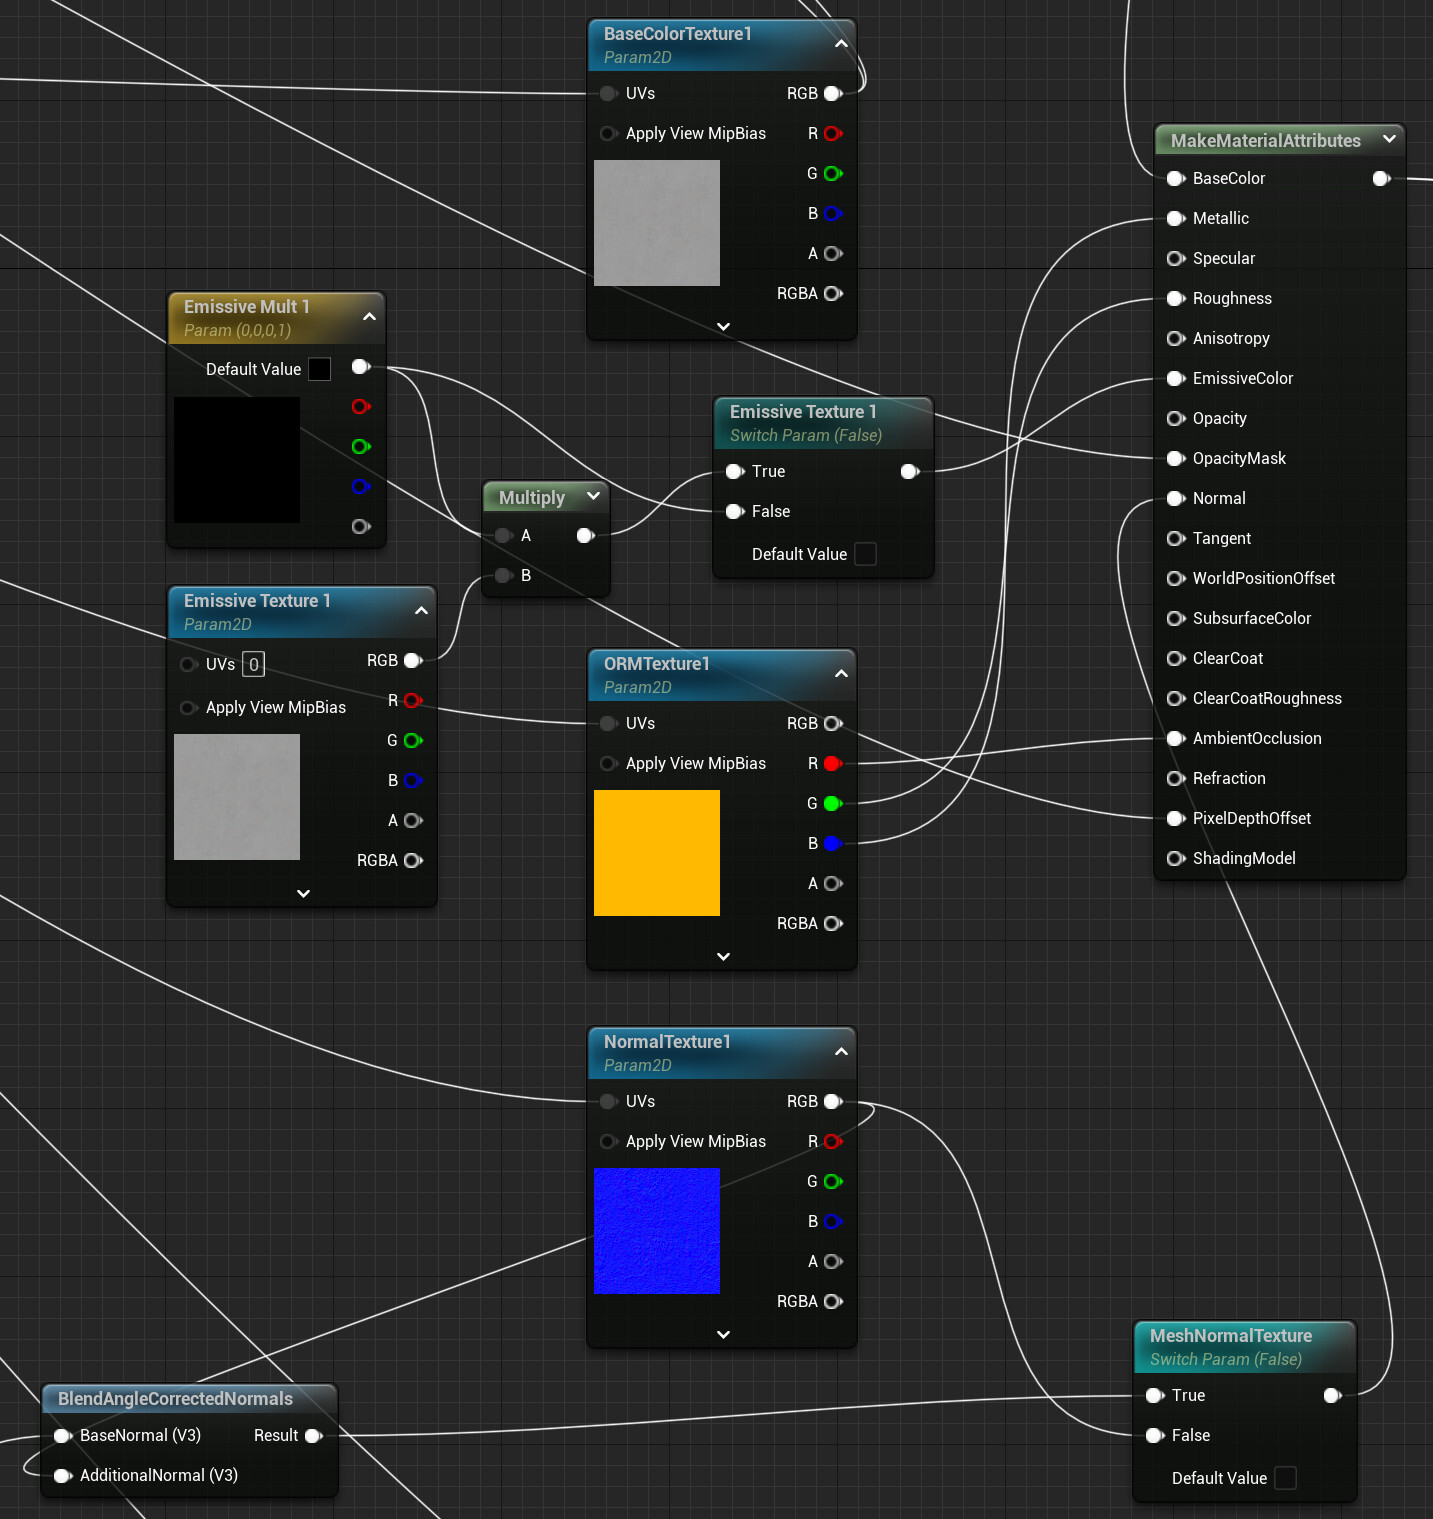
As I worked on the project I continued to add features to my master material. I added static switch parameters to toggle them as needed. I also created a material function to make adding tiling to various features easier. In a production situation I would probably break this out into a few separate materials to keep things efficient and easy to work with.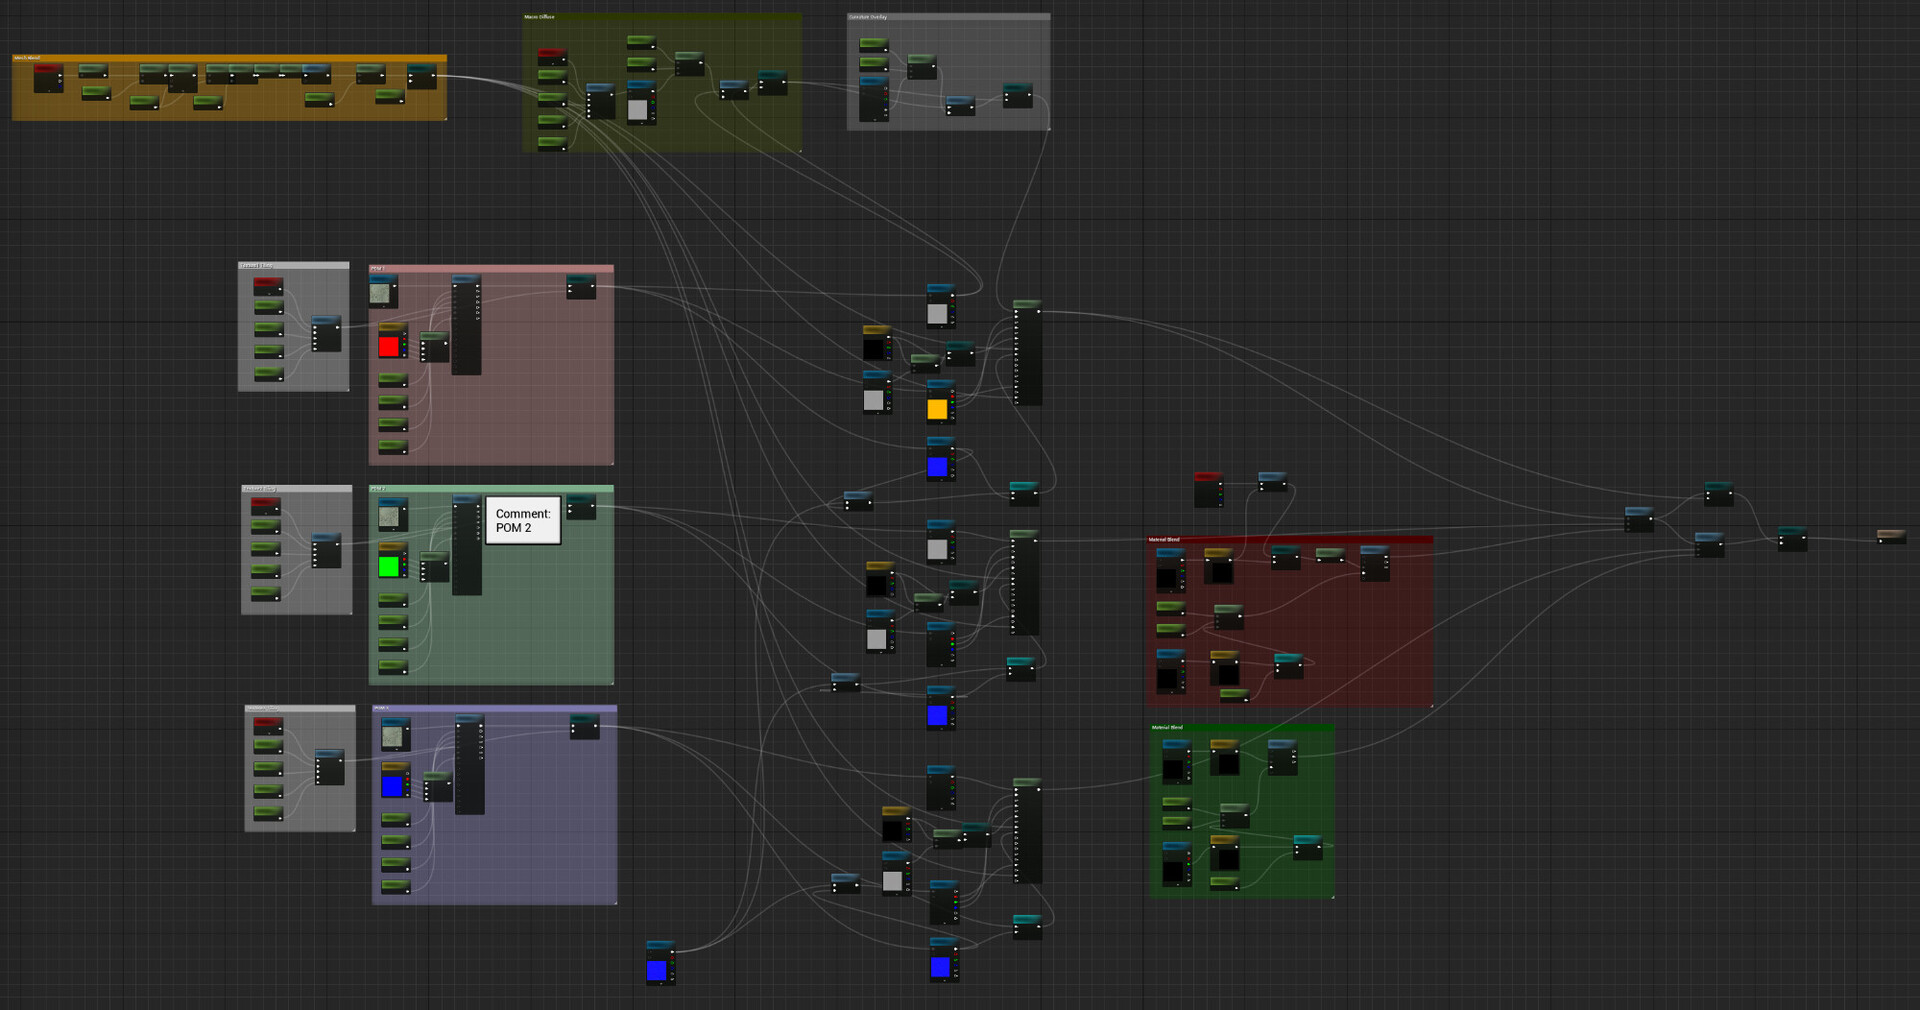
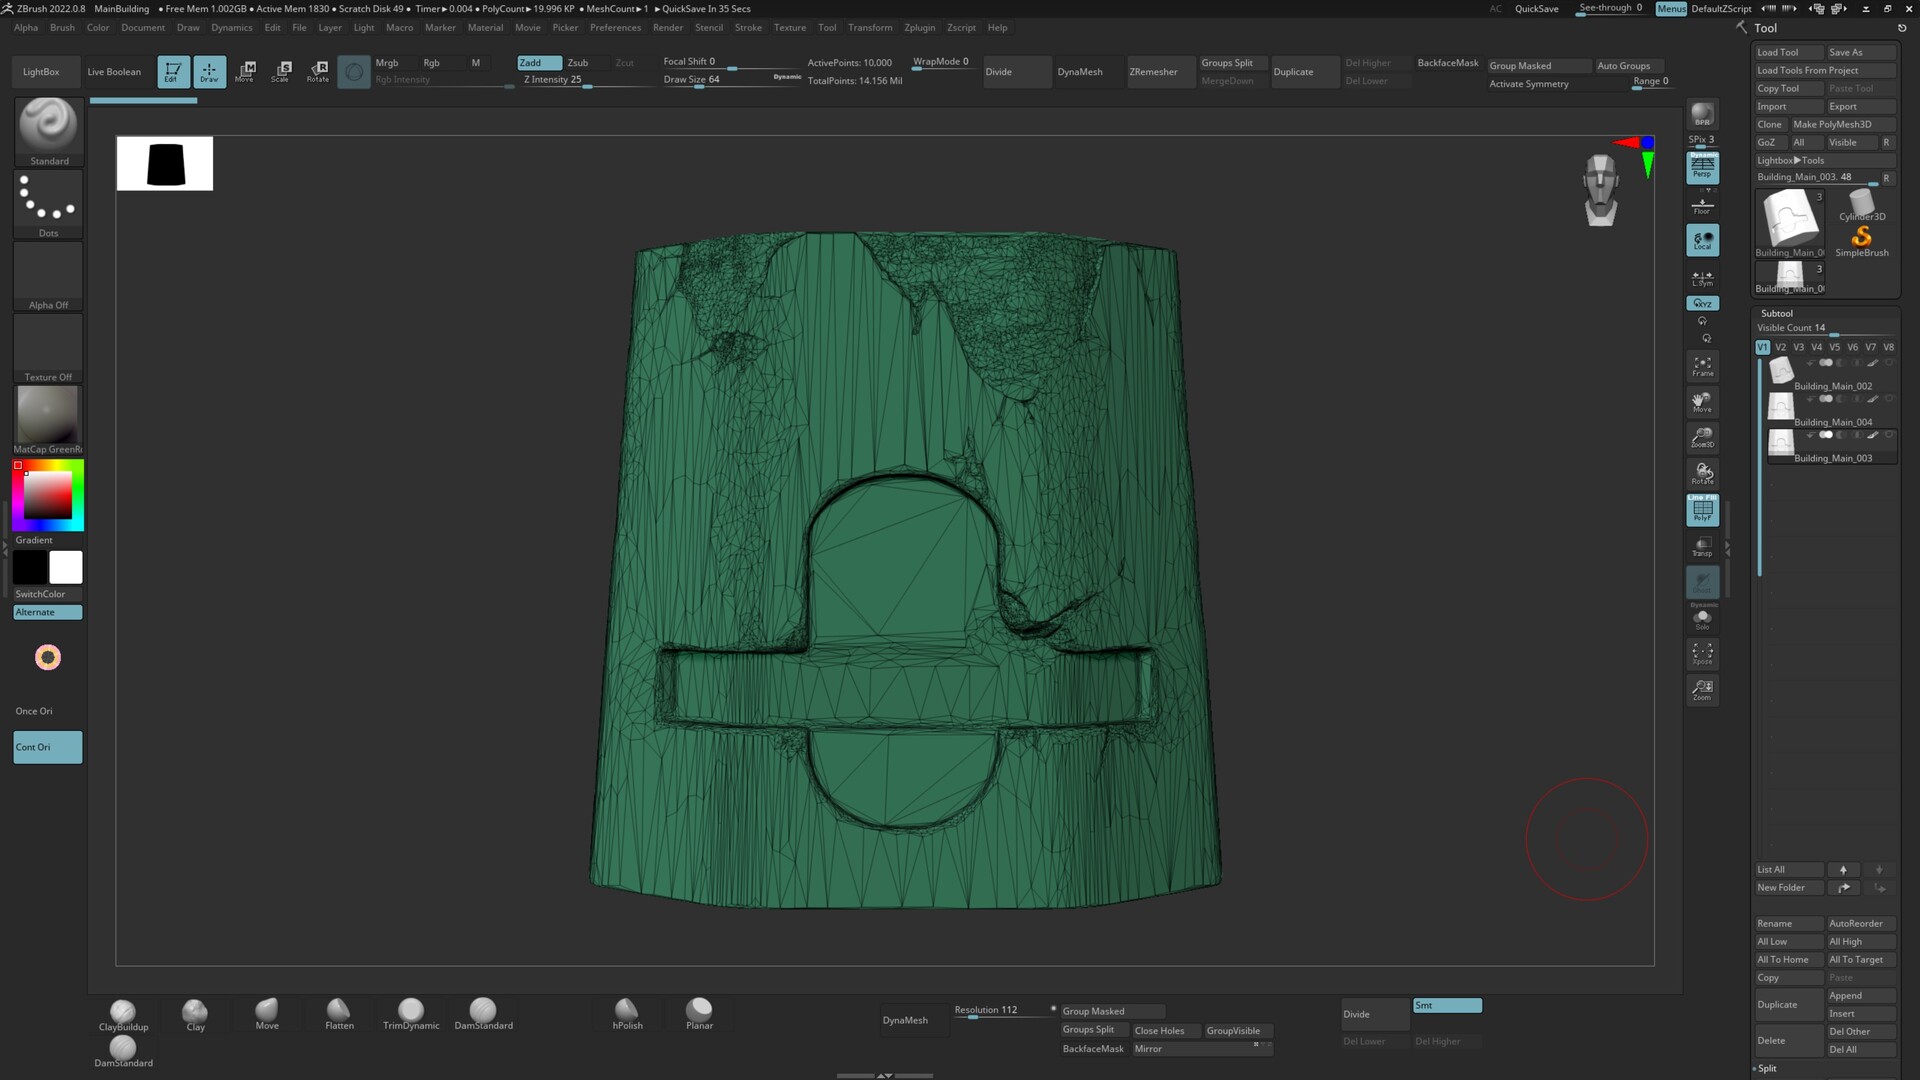
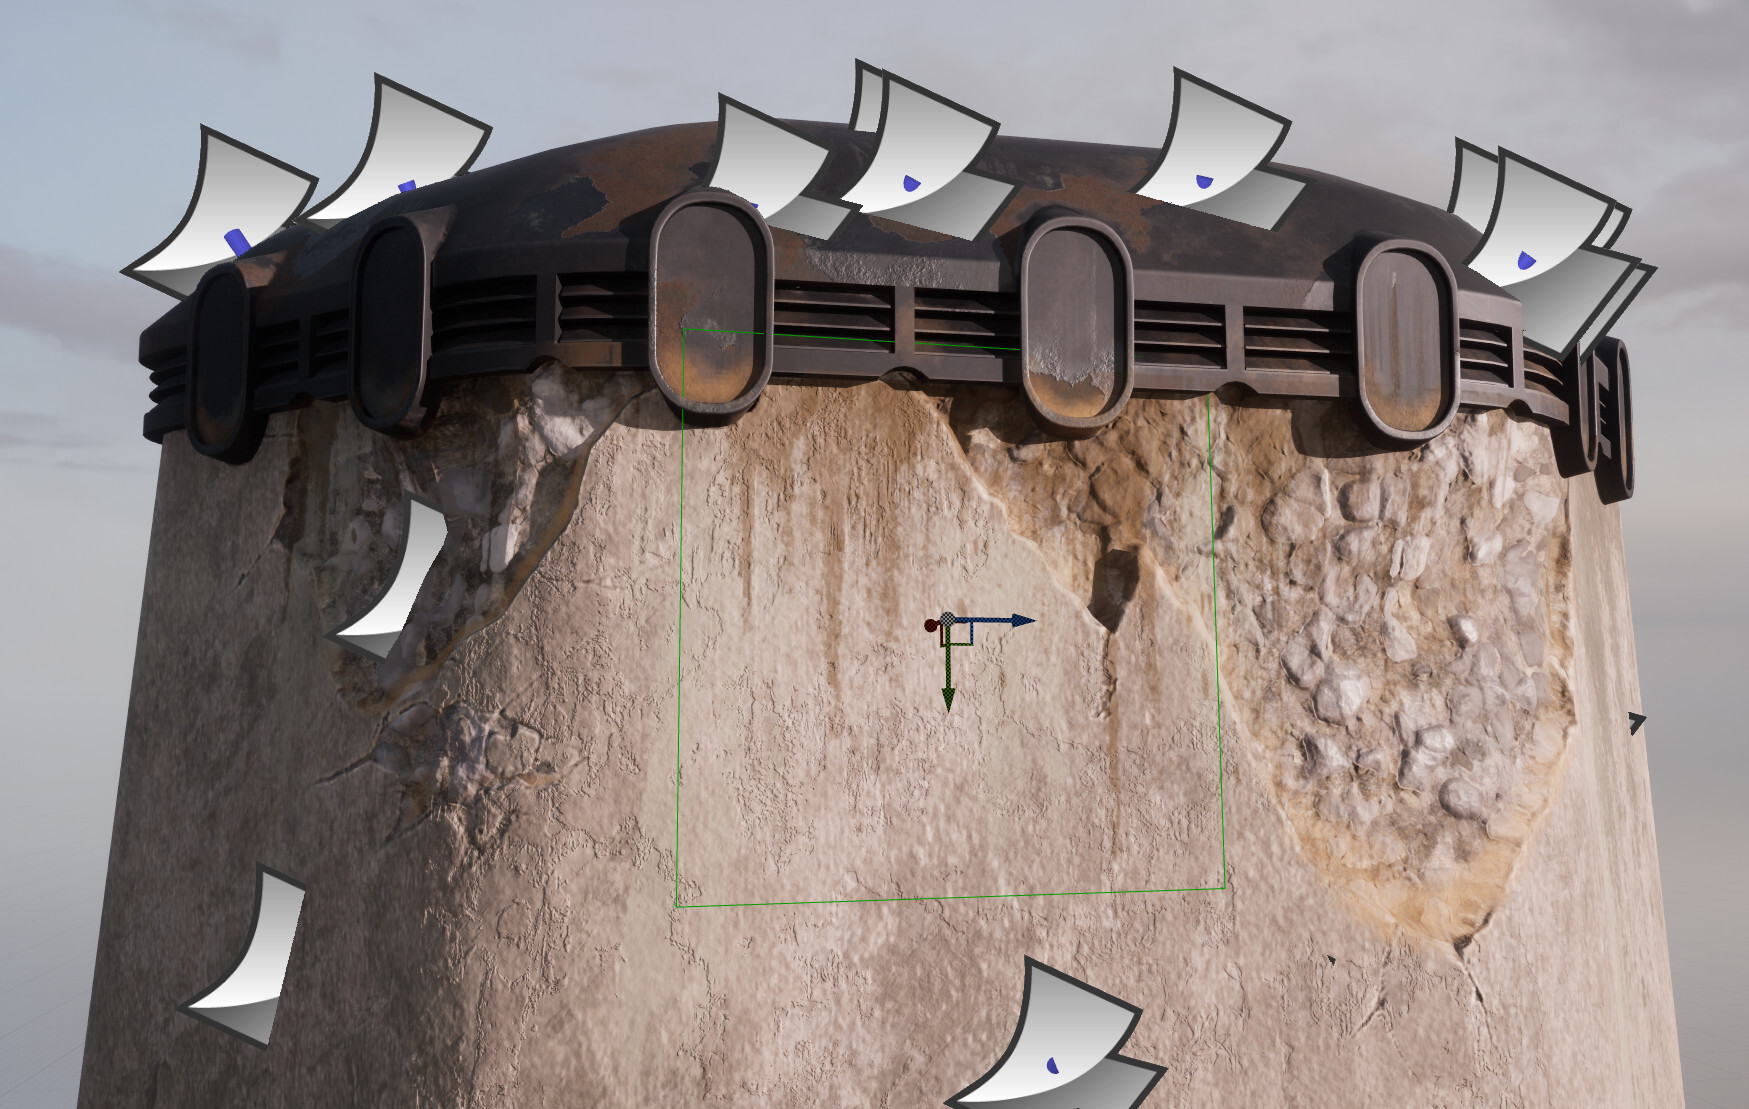
To get the extra crack and wear details on the building I took my base mesh into ZBrush and sculpted.
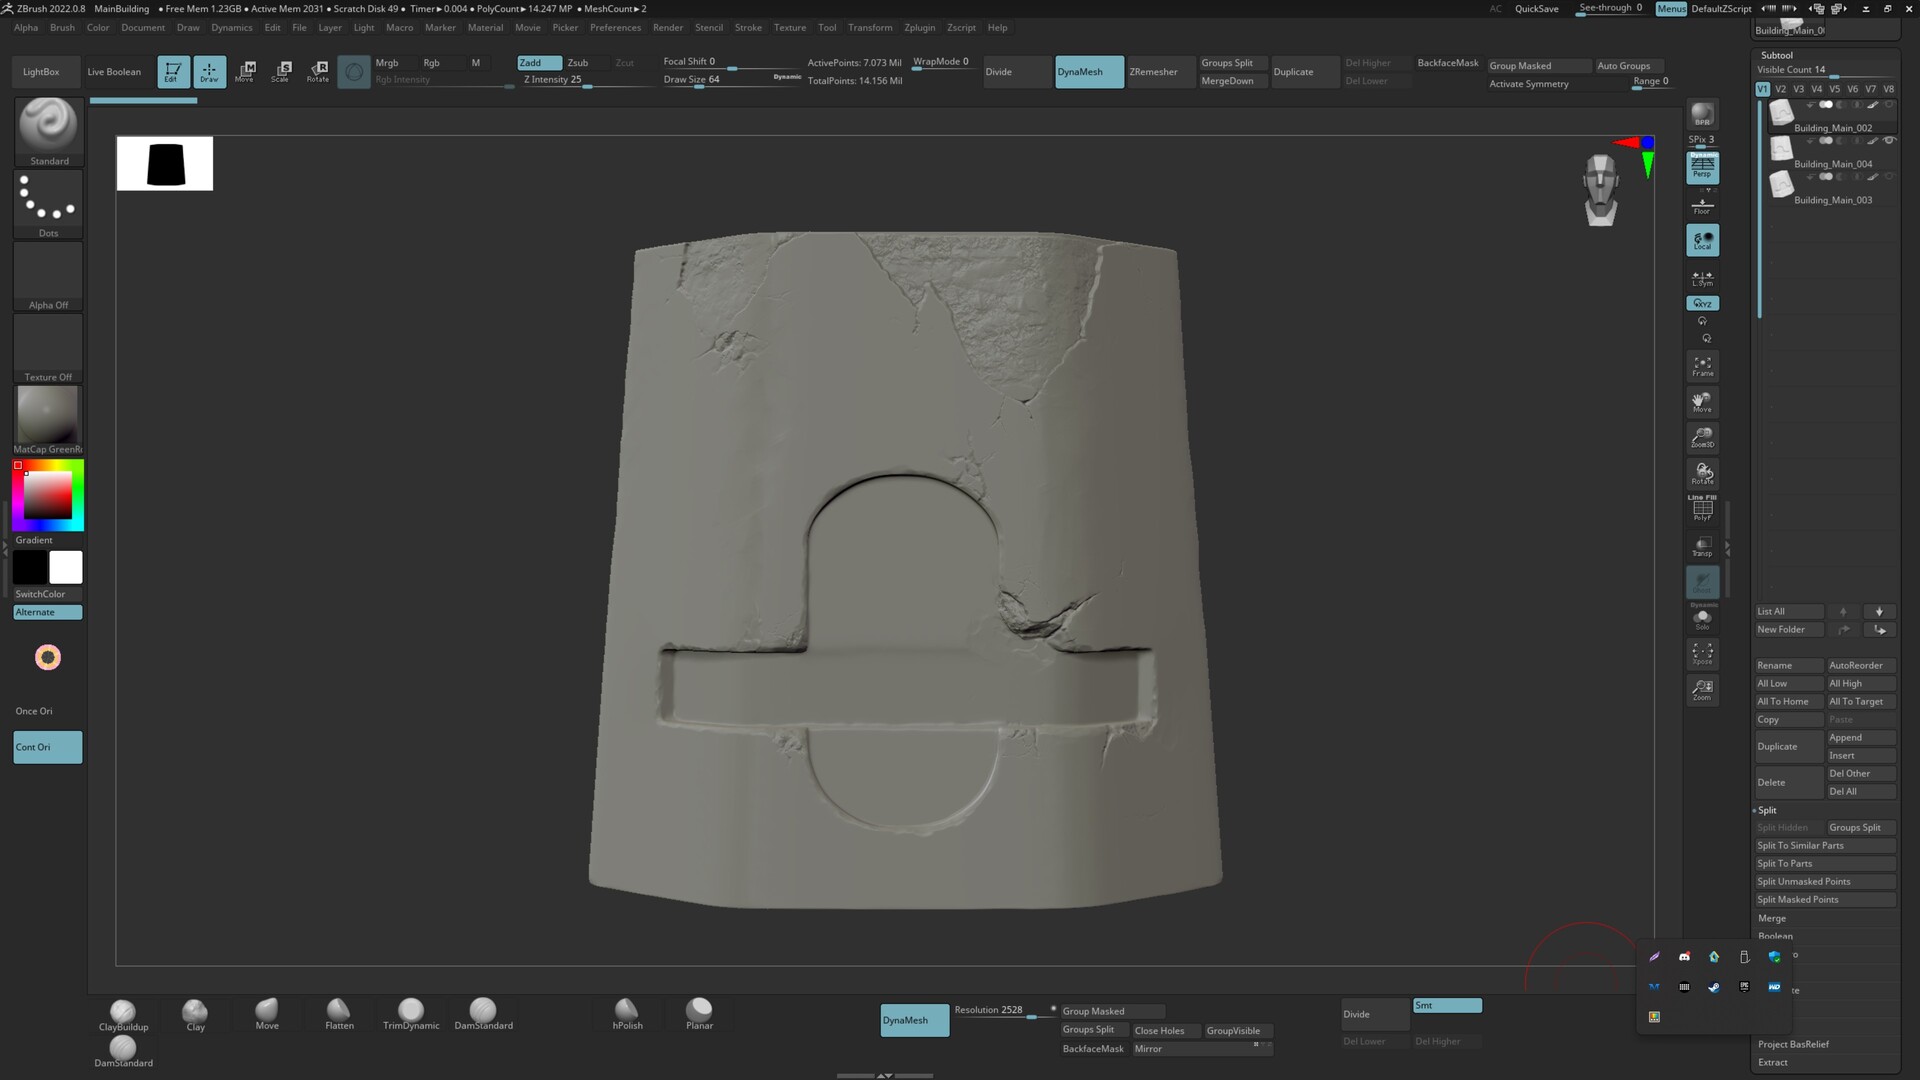
In order to maintain the larger changes to the silhouette I used Decemation Master to create a new low poly mesh.
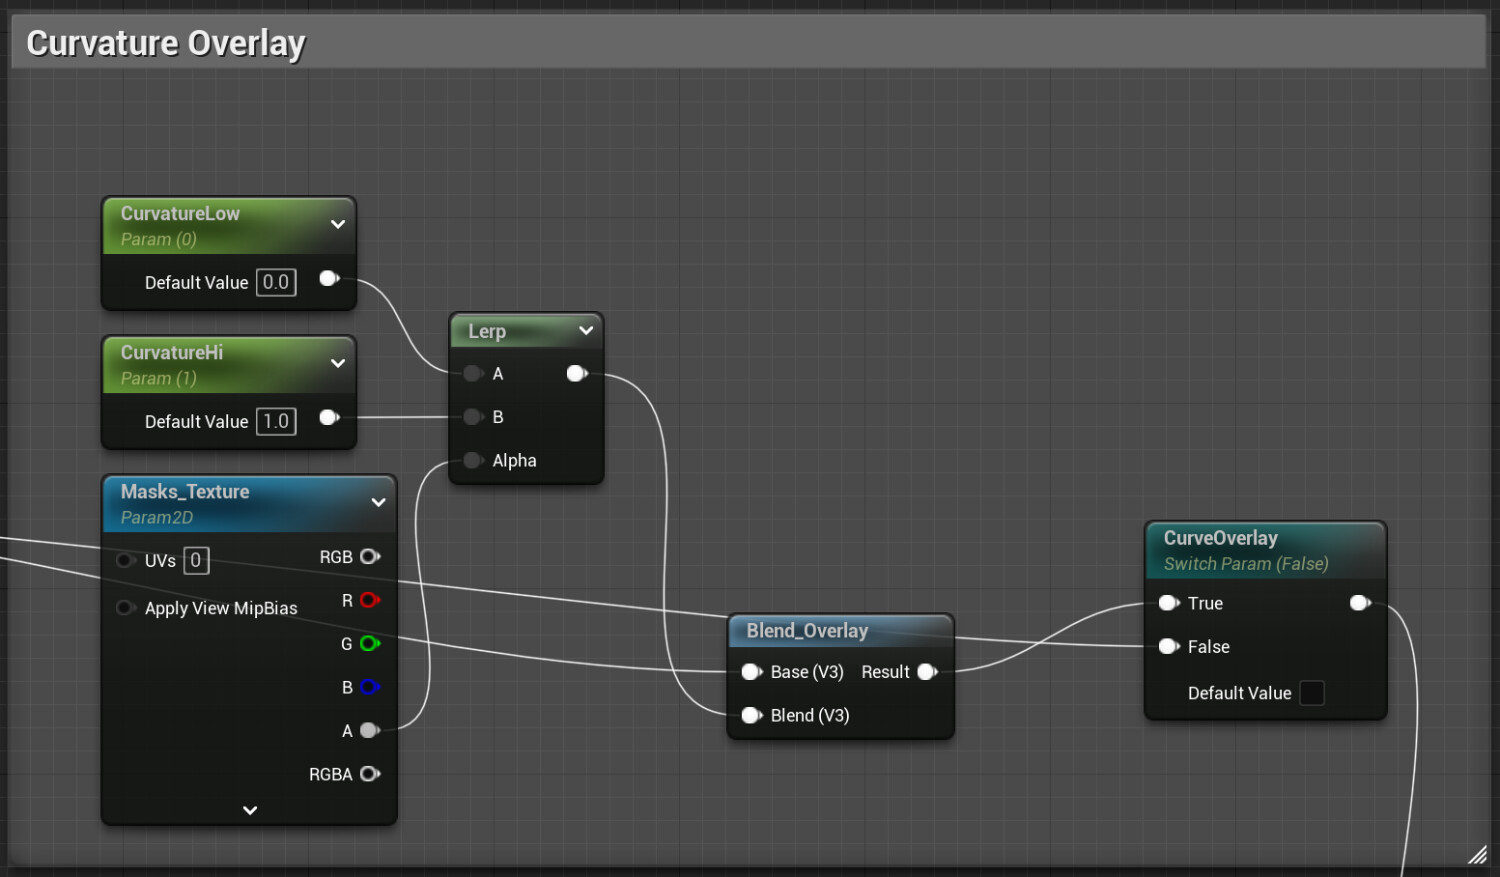
After taking the meshes back to Blender and making UV adjustments, I baked curvature and normal maps in Marmoset Toolbag.
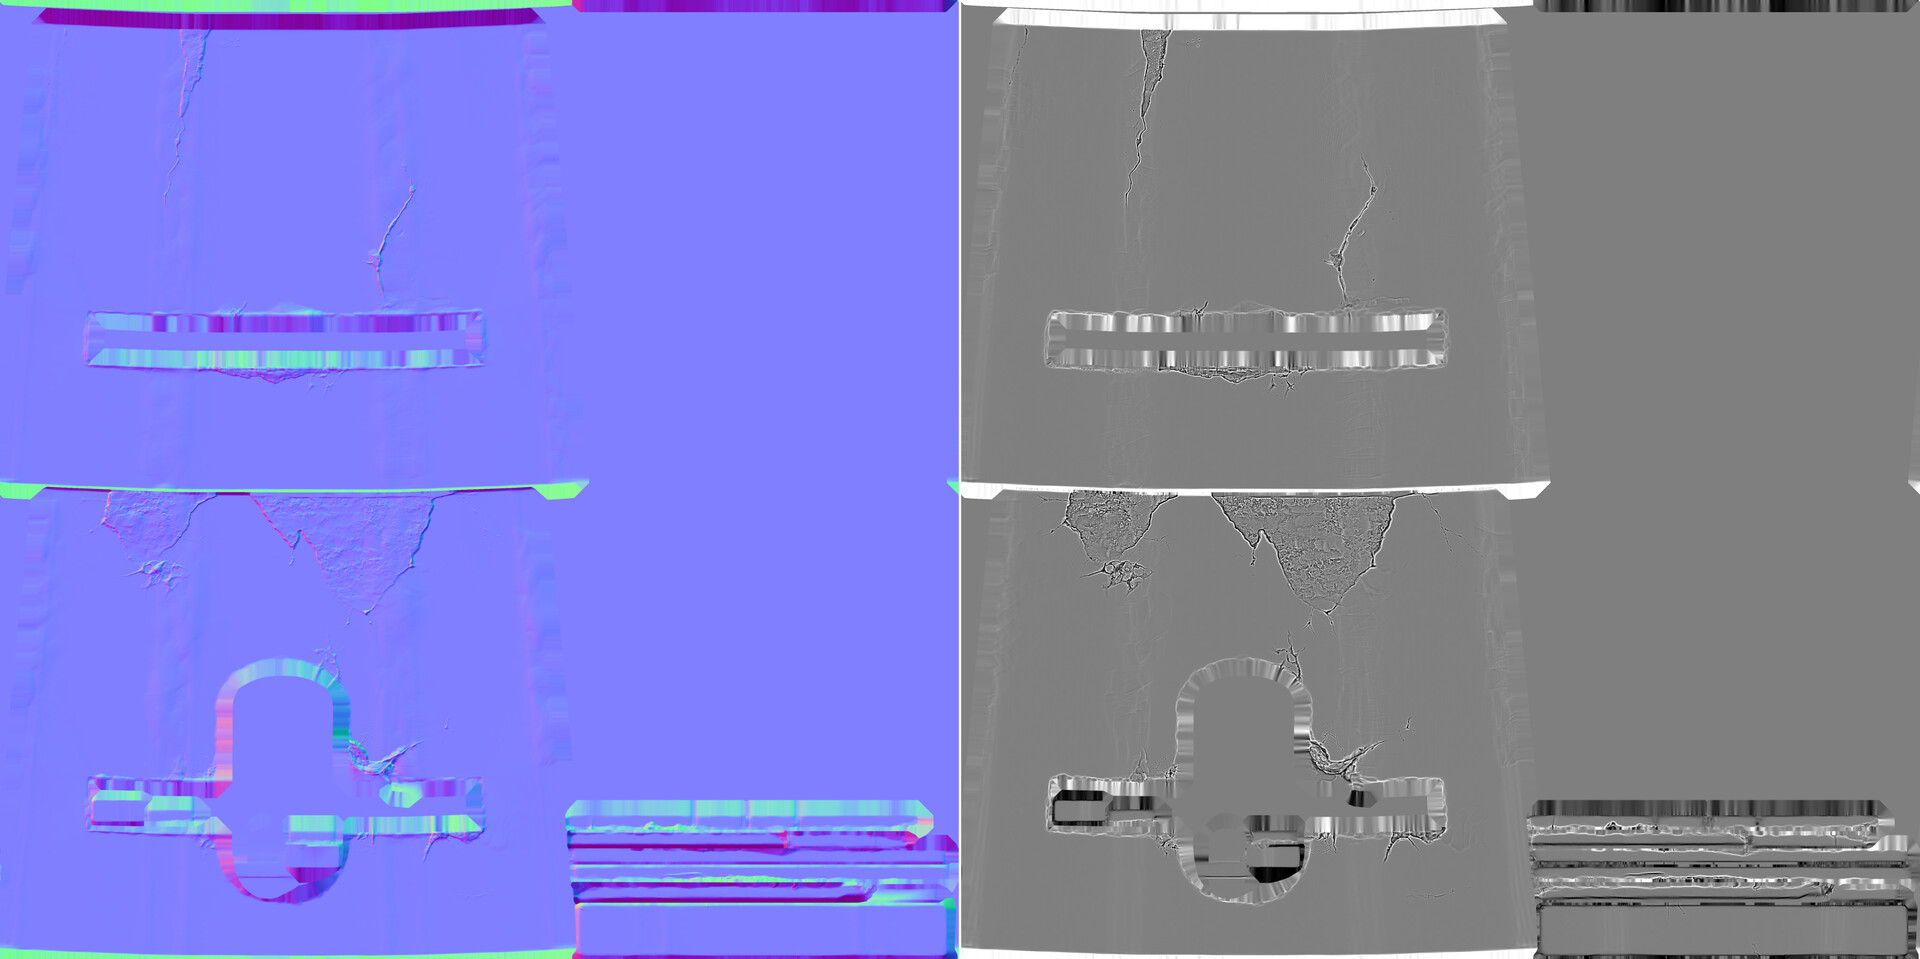
The baked normal was blended in the Unreal material with the normals of the tiled materials using a BlendAngleCorrectedNormals node. The curvature was overlayed on top of the base color texture in the material to add a bit more sharpness and definition to the sculpted elements of the mesh.
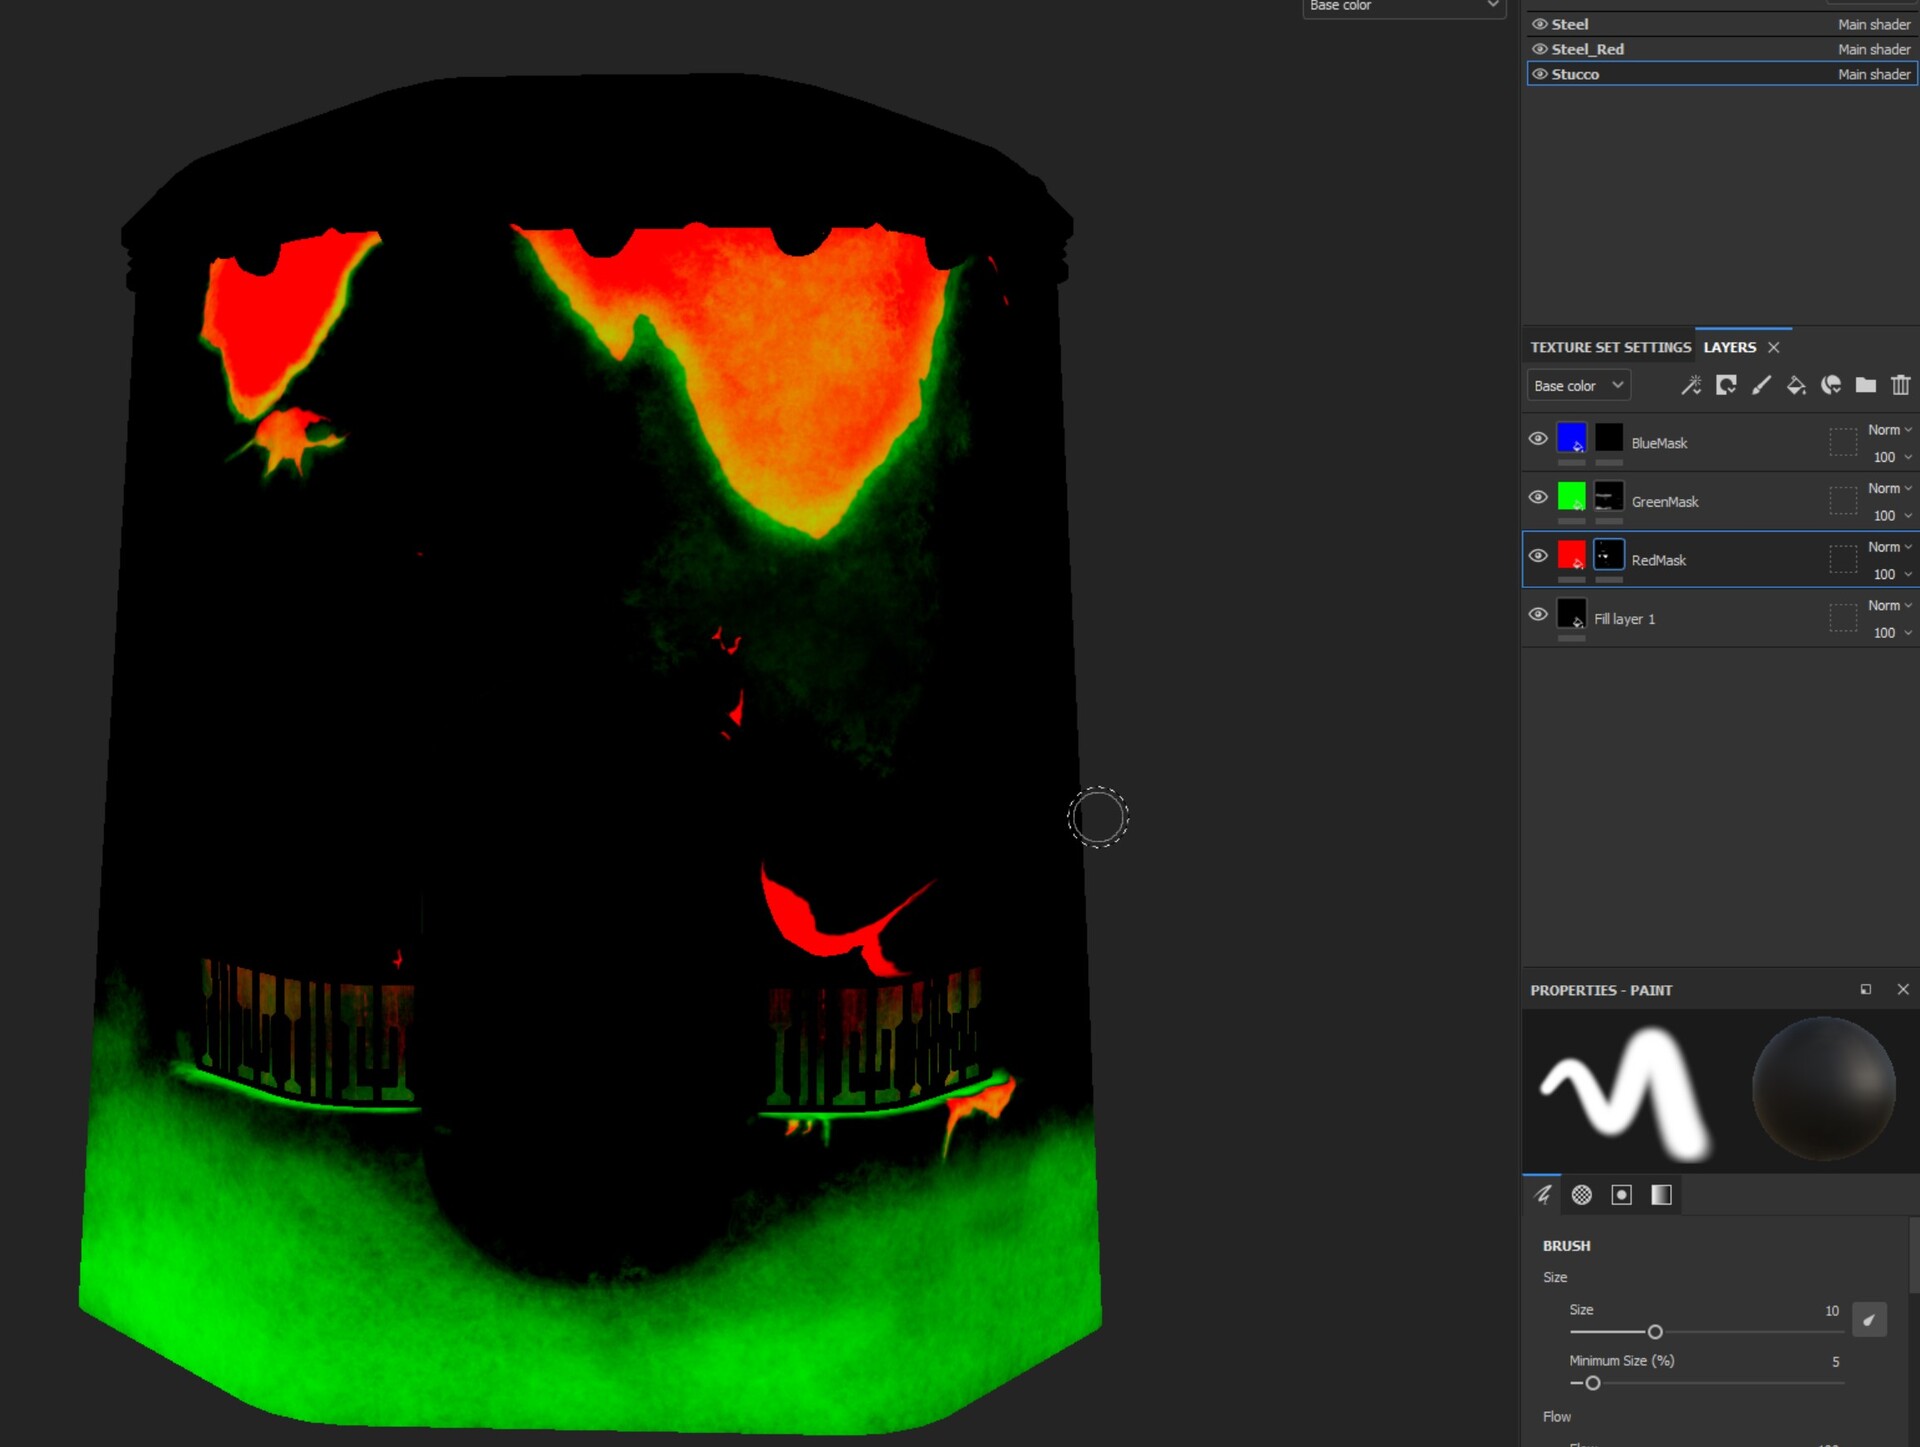
Jobye shared some images from his work on Jedi: Fallen Order that demonstrated how he painted masks to blend tilable materials in Substance Painter. Here you can see how red and green layers were painted to create a mask for where the stone and sand materials should go.
My master material used Material Attributes, and a height lerp node to blend between them using a height texture and the painted mask textures. I also added the ability to paint vertex color to further modify the masking.

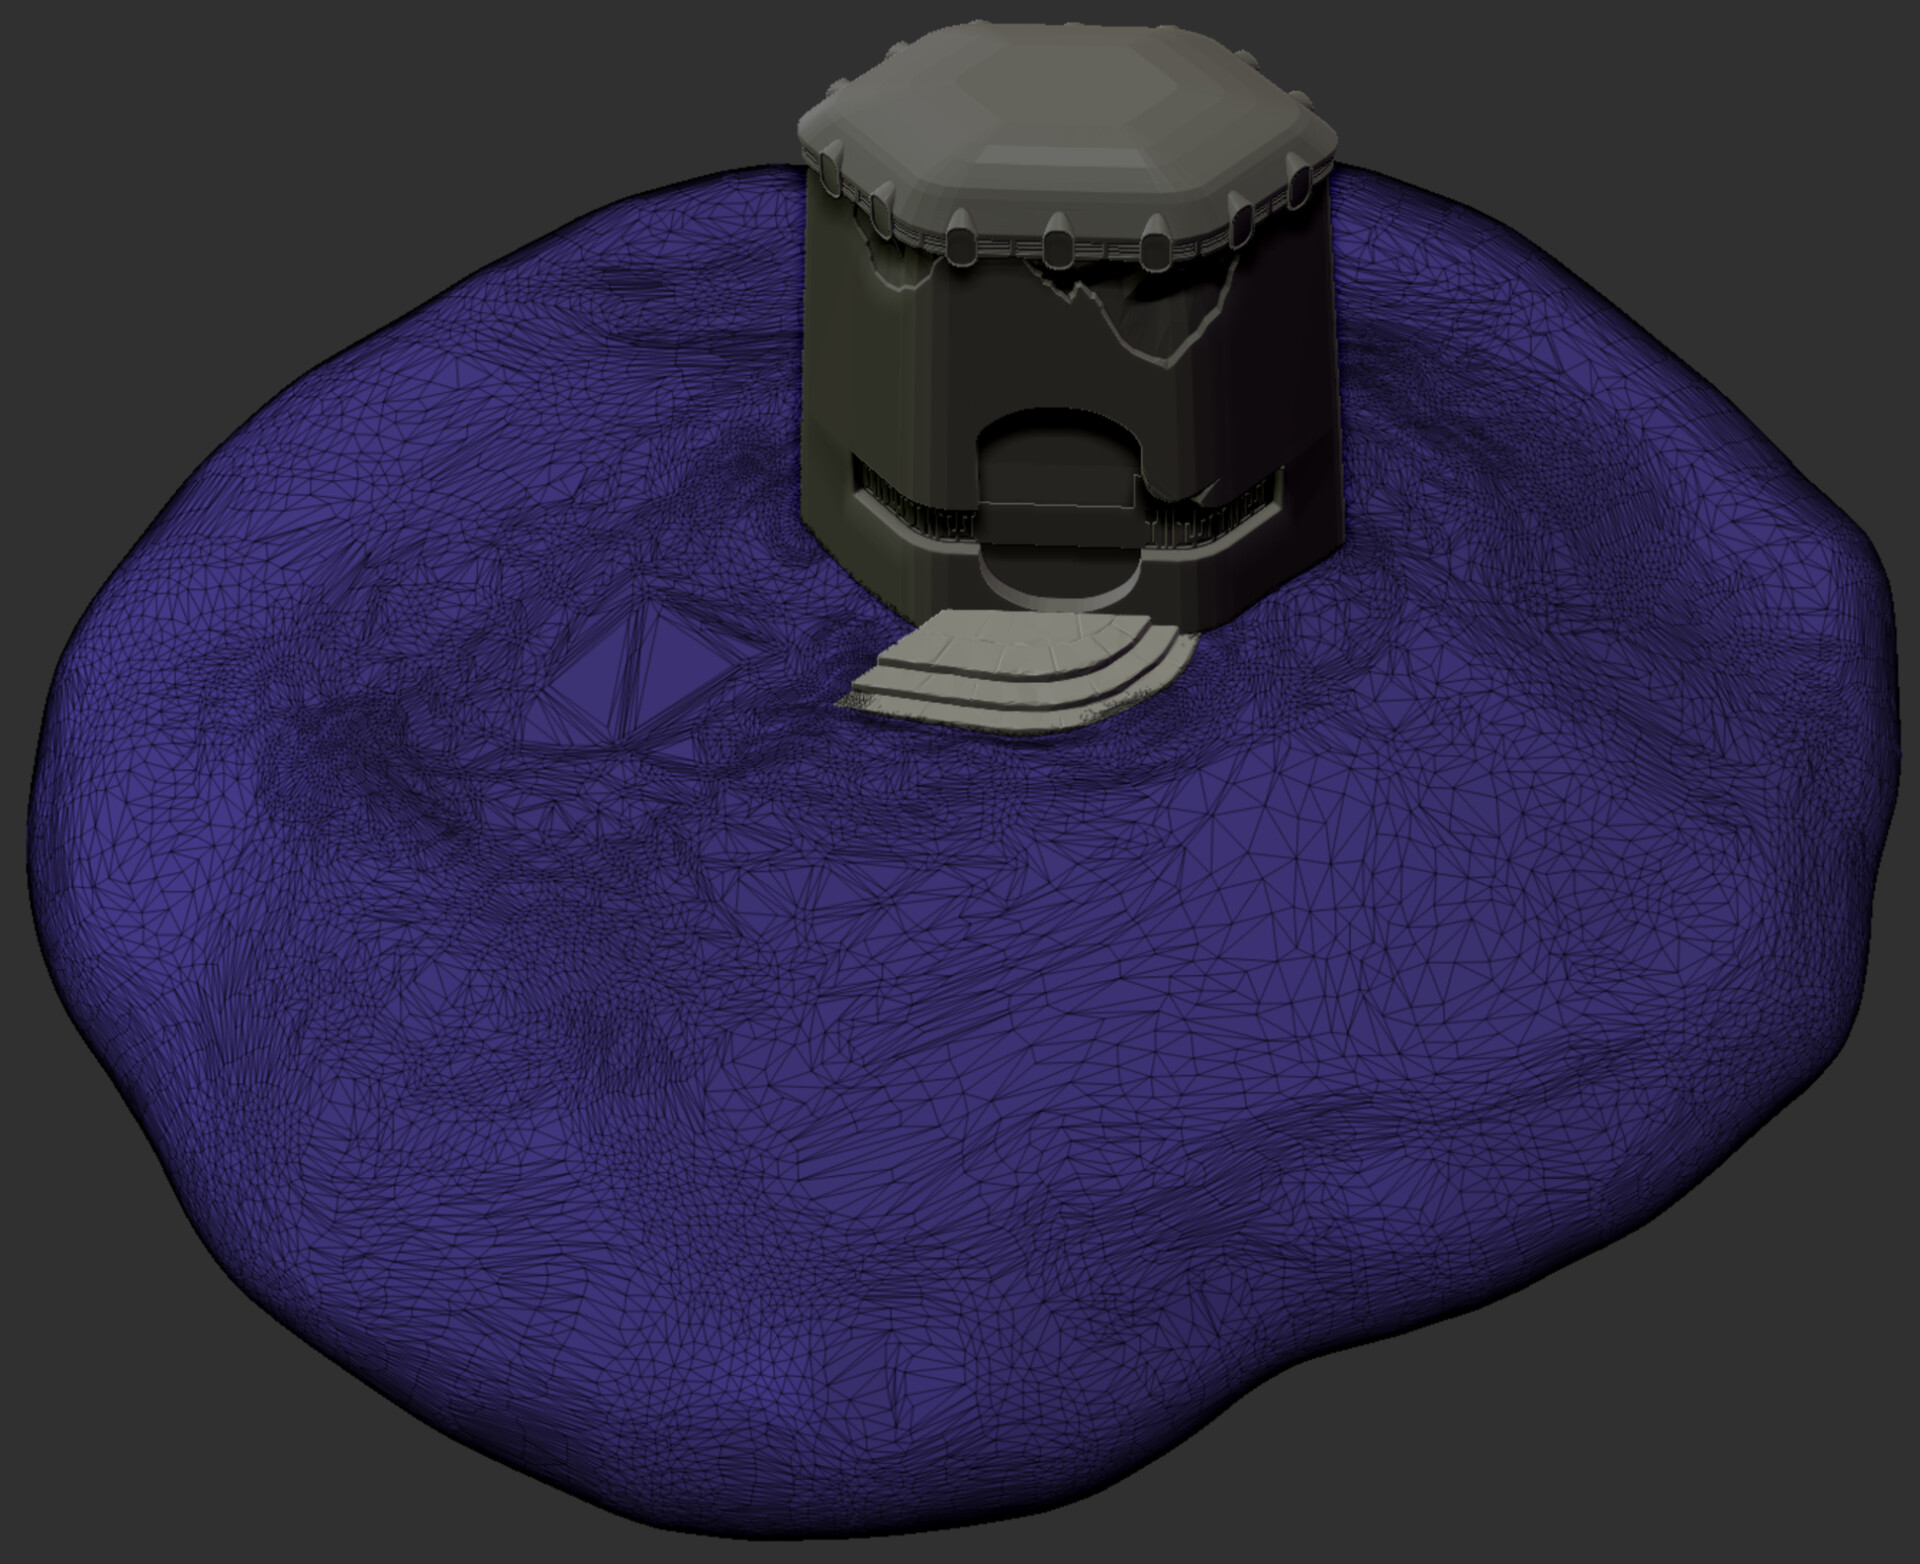
I created the initial ground mesh in Blender where I did some simple sculpting to get the base shape I wanted. Then I took it into ZBrush for further detail sculpting and decimation.
I used pixel depth offset to blend where the sand material meets other meshes. The output of the graph below plugs into the OpacityMask and PixelDepthOffset inputs of the material.

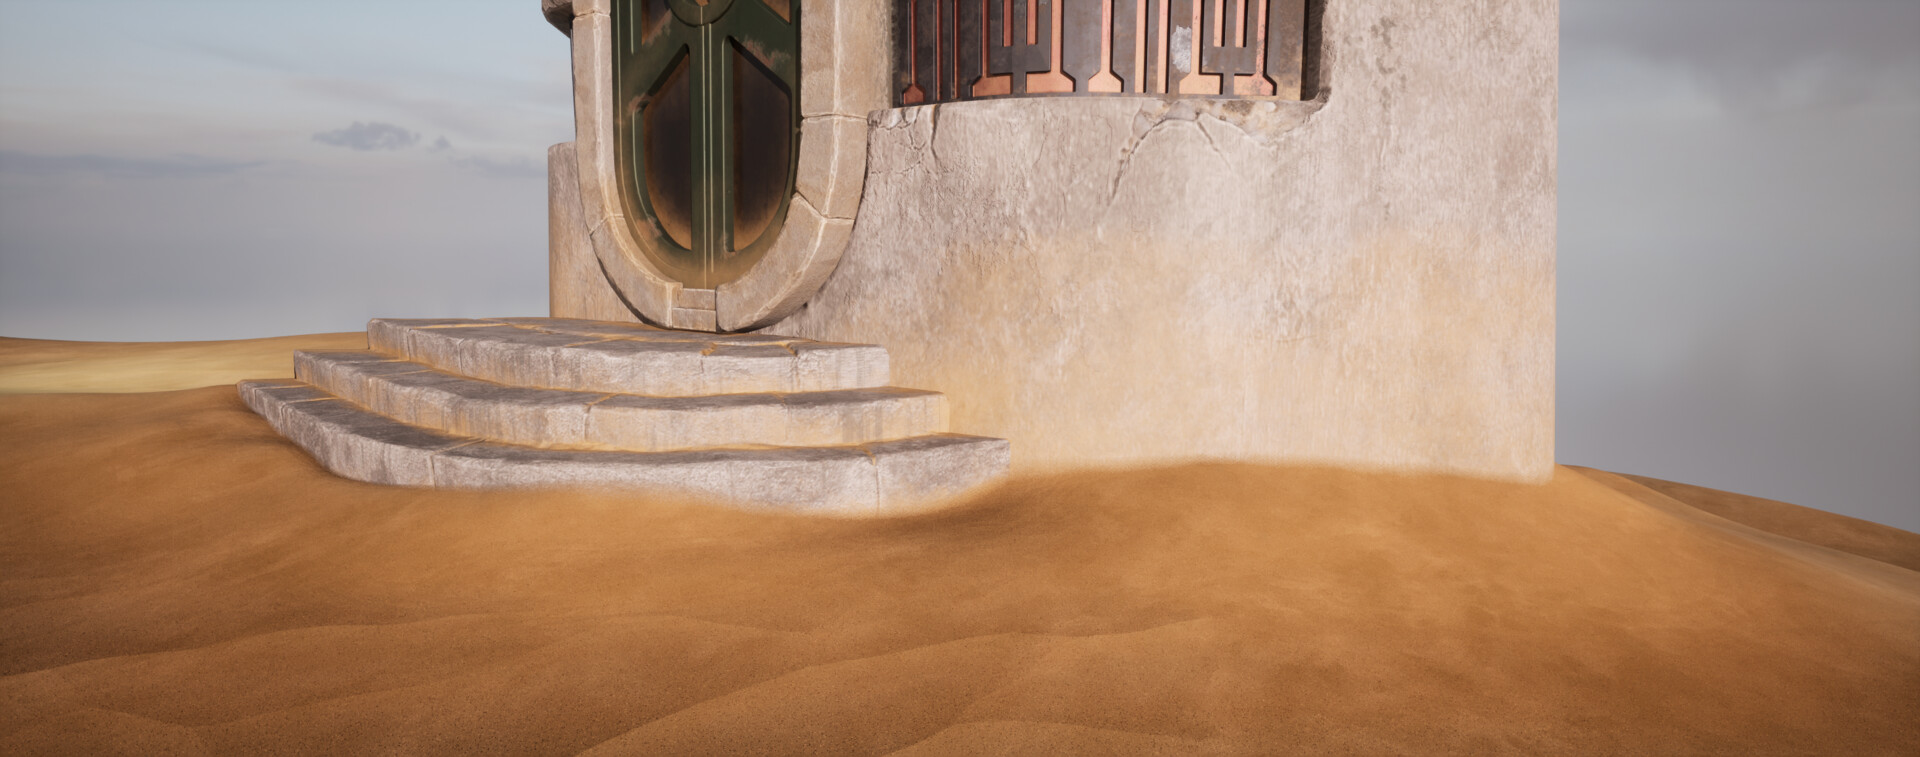
I used deferred decals to add stains and leaks to the walls and roof. Possibly more than would be ideal for optimization, but for now it's achieving the desired effect.
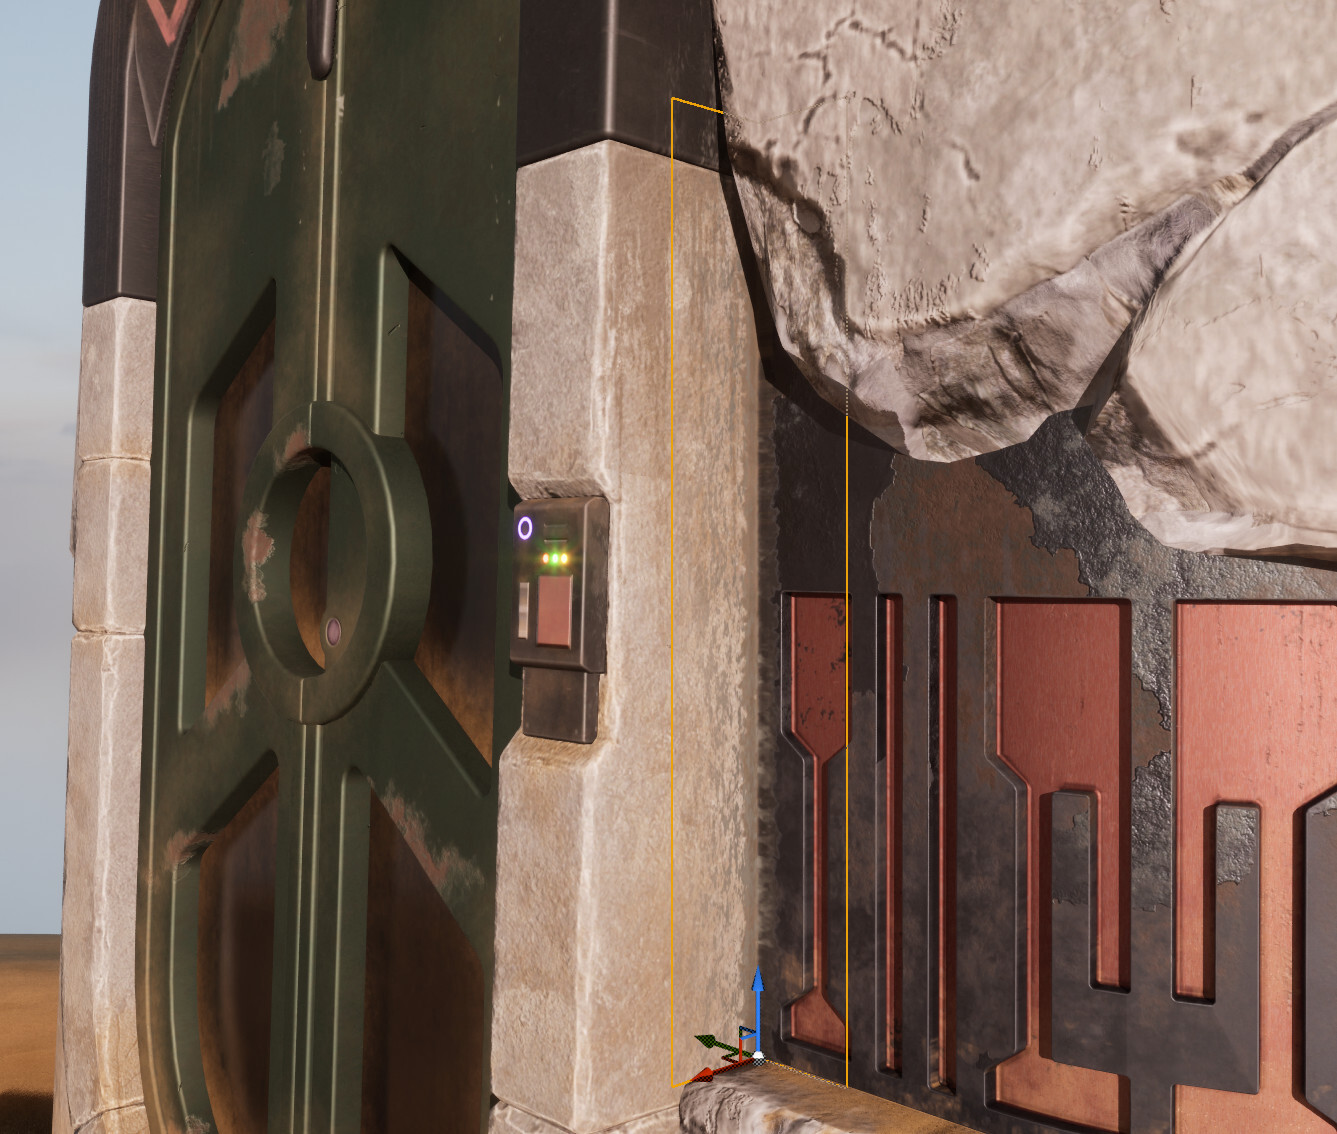
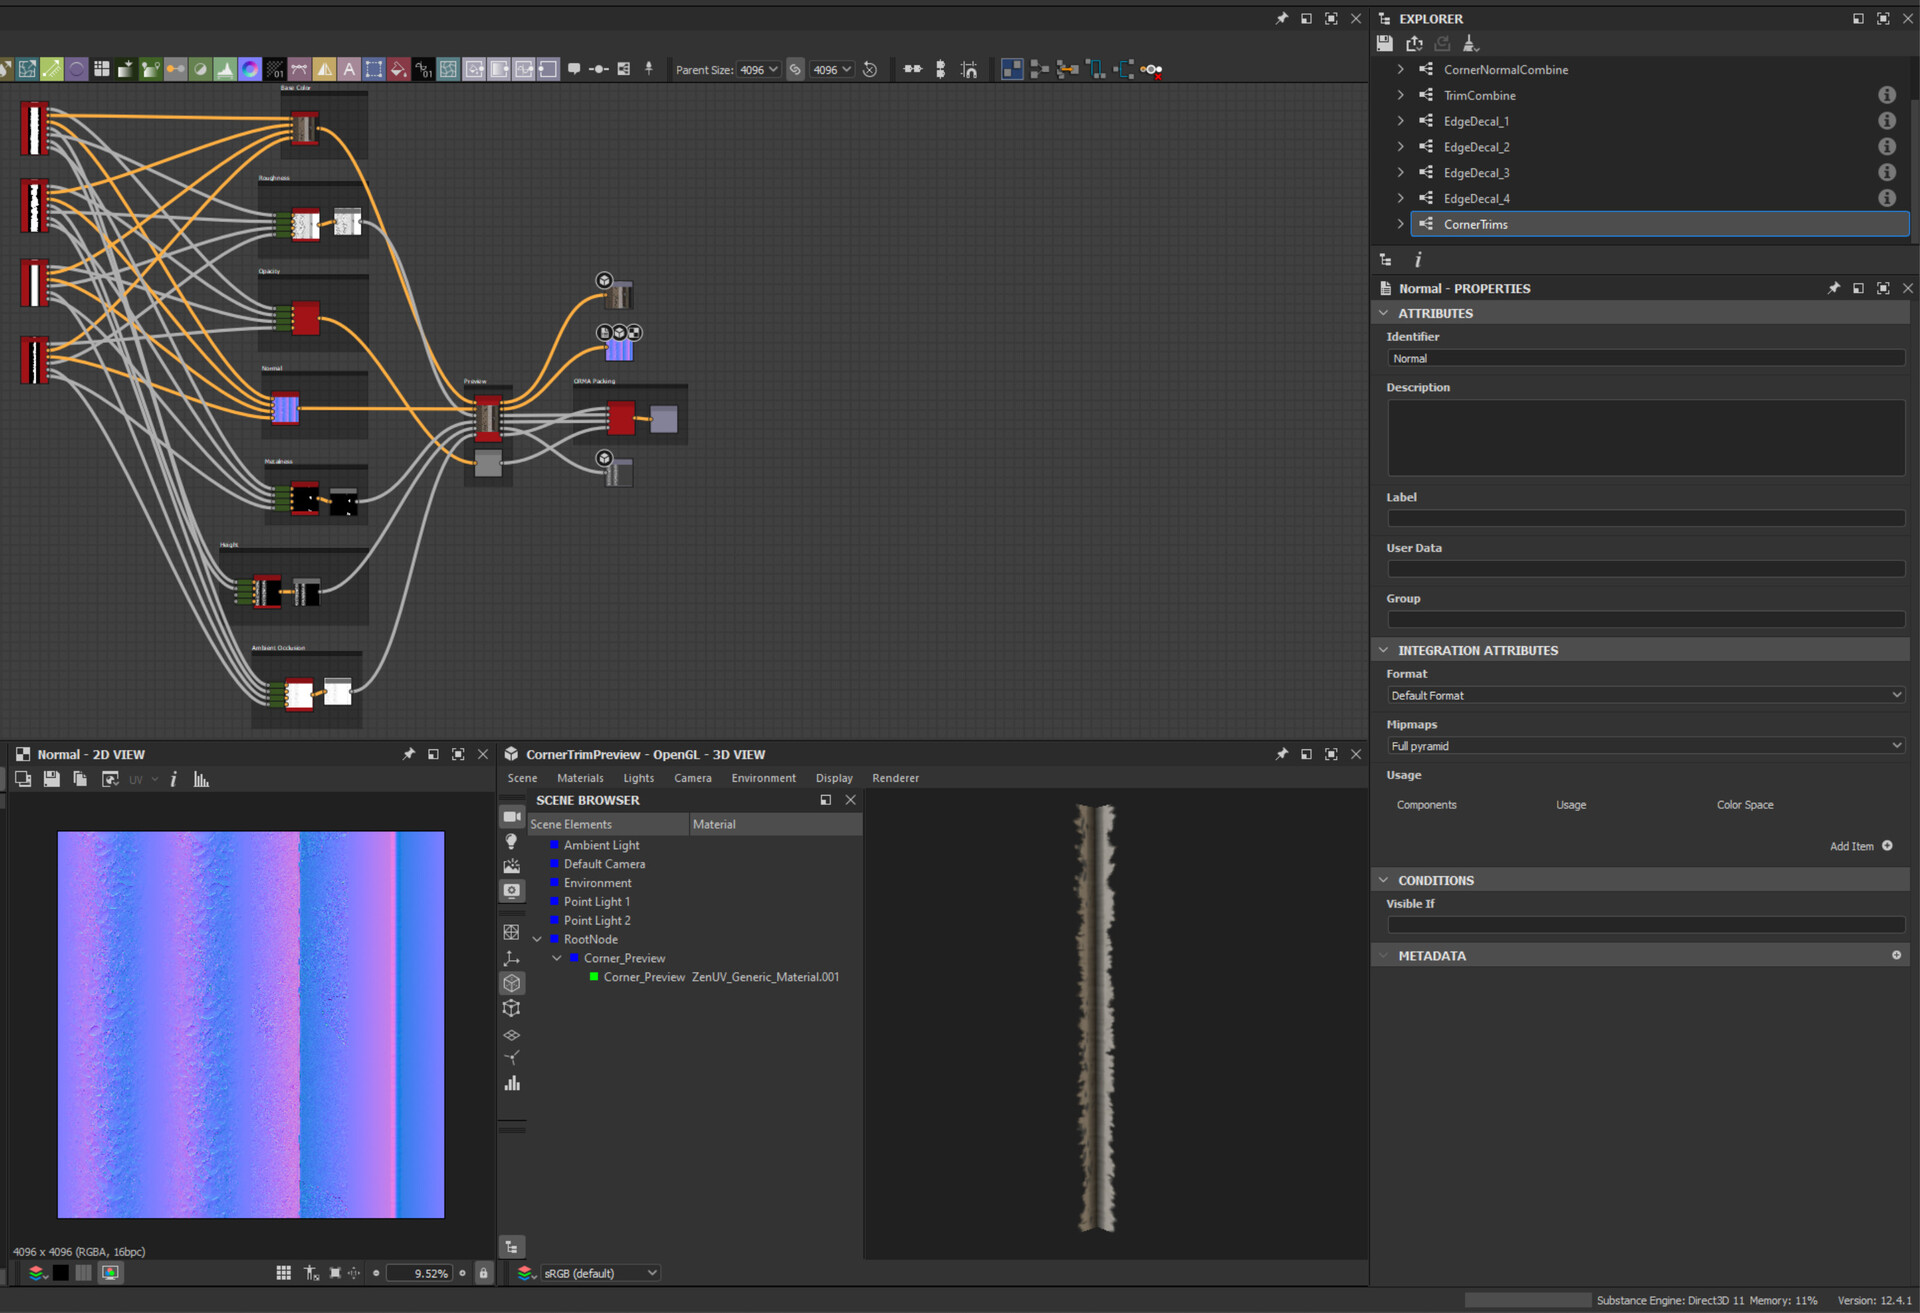
The intersection of the door and wall was looking too sharp and artificial, so I built out a corner trim material that also used deferred decal blending.
I dediced to find a different sky image that was later in the day so that I could get the effect of some of the lighting I was picturing from the night version paintover I did. It also doesn't have any ground or foreground elements which should work better for a diorama.
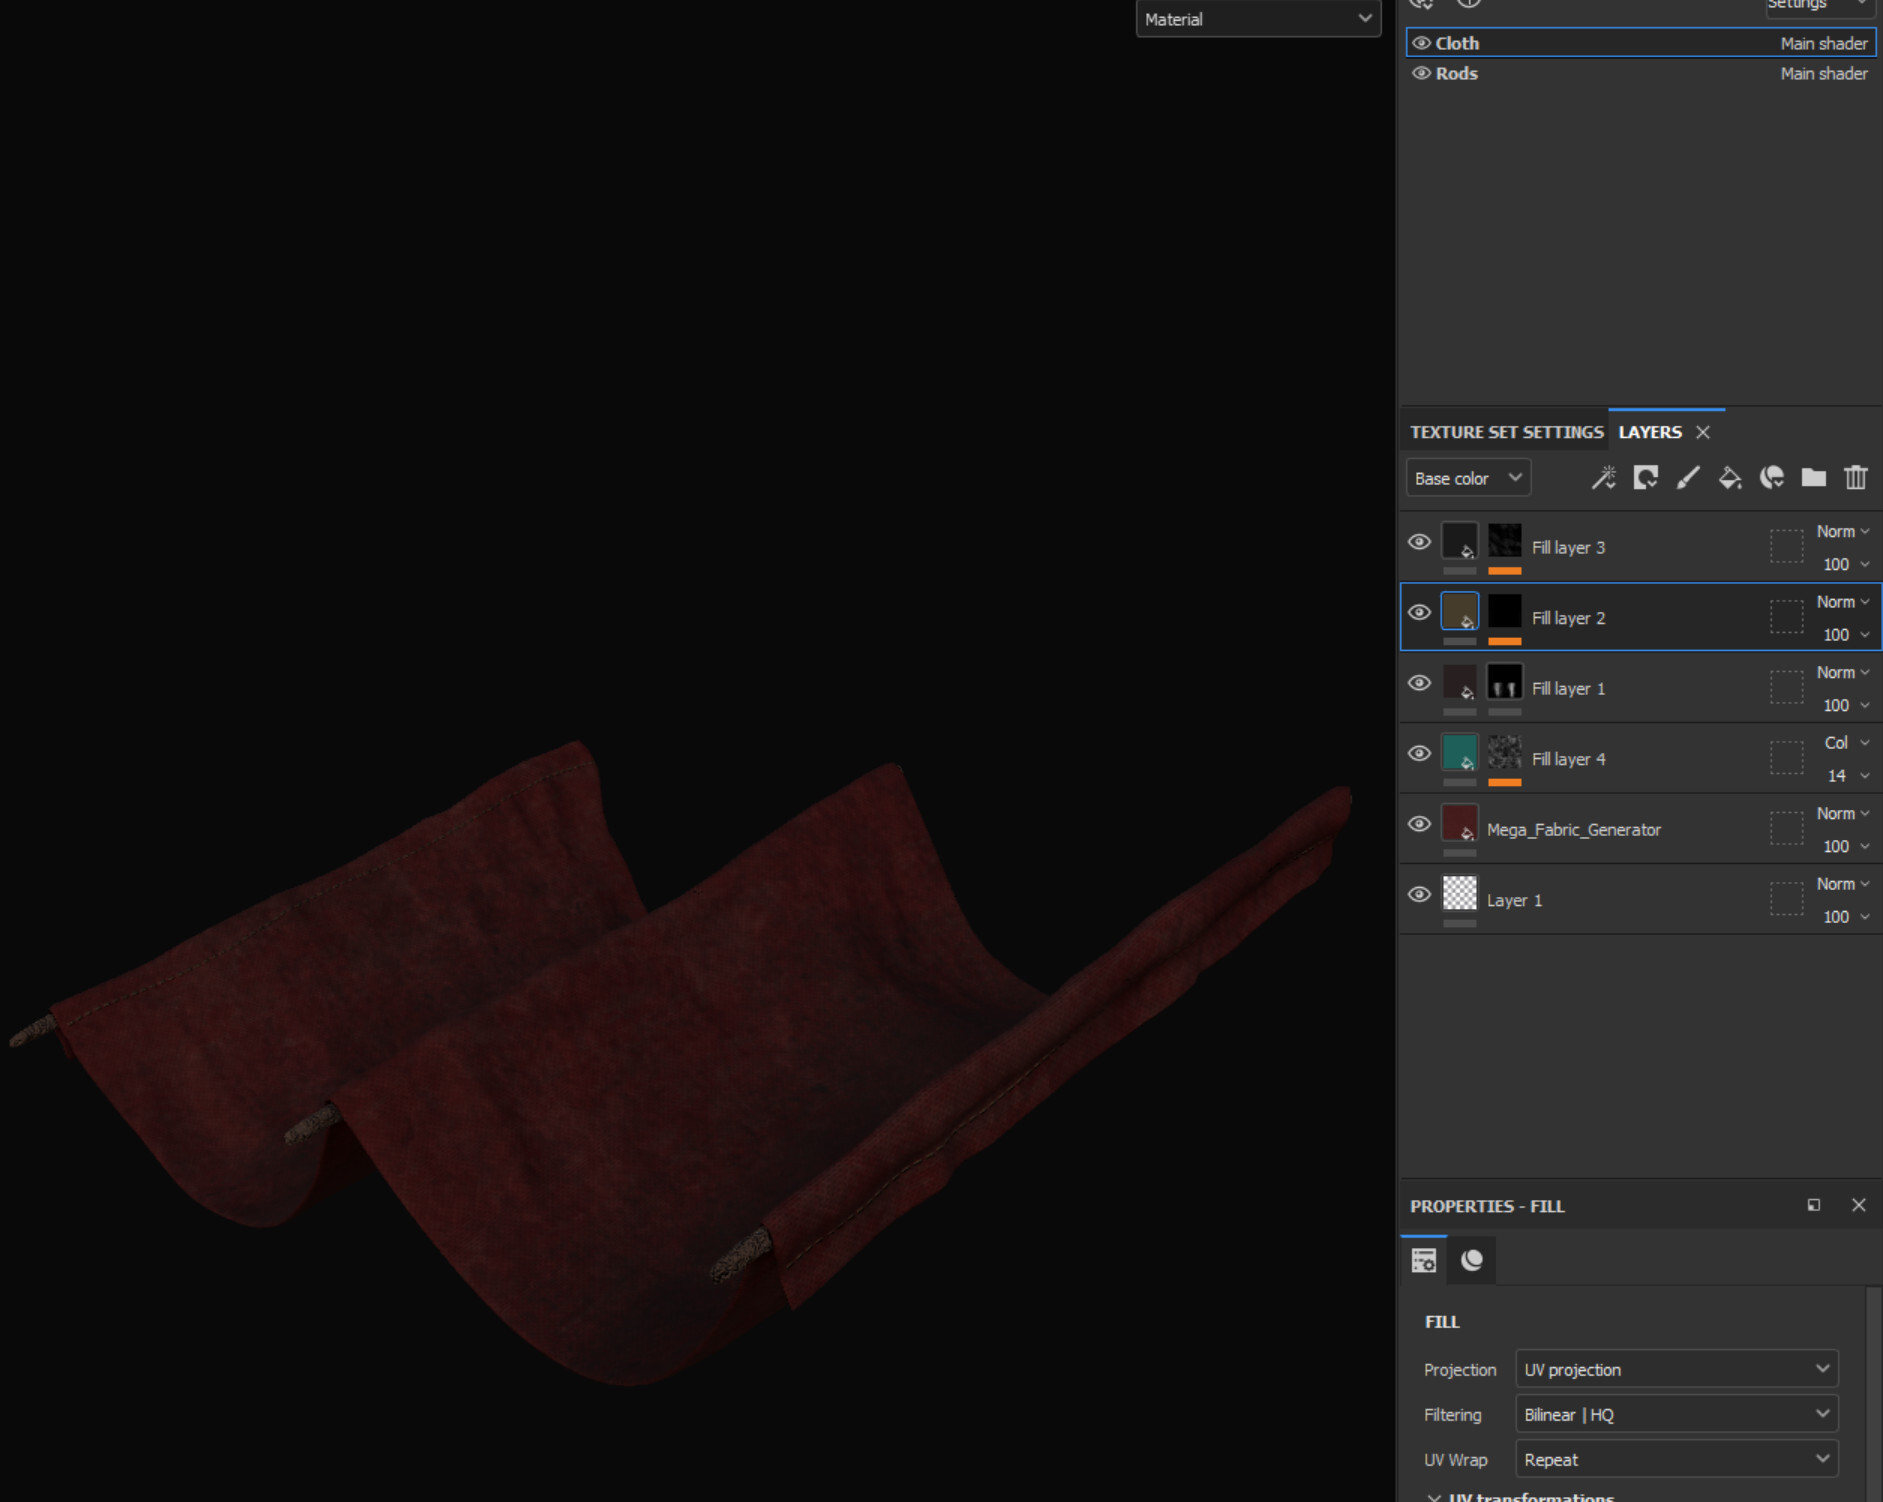
In addition to the building models that used tiled materials, I created models that had their own specific textures painted in Substance Painter. I used the tiled materials I had created in Substance Designer as base materials here.

The awning was modeled in Blender and used a cloth simulation to get the initial folds and wrinkles. Then I sculpted additional details in ZBrush before painting in Substance Painter.
And that brings us to the finished vertical slice. It's been a great learning experience, and being able to get the feel of a production workflow from Jobye has been invaluable. I'm feeling much more comfortable working with the various software I've been getting better acquinted with over the last year. I'm also feeling much more confident about putting together environments in the engine as a whole. There's a lot more work to do to finish the scene, but having the workflow established should help it go much more smoothly. I'm excited to jump into the third pass. More to come, and thanks for following allong!


